
Missouri Winter Wonderland
Hey Dogleggers, long time no talk! I promise I haven’t forgotten about you guys—I actually daydream about blogging quite often. For those who don’t know, I’m currently in my junior year of college, so let’s just say that I have to write a lot of stuff that’s not about disc golf during the school year and my brain can only produce so many words in a week.
Anyway, I’ve been DYING to tell you guys a little bit about the crazy winter we’ve been having here in Missouri. It’s been a winter wonderland. Not “wonderland” like the deep snow and beautiful trees on a Christmas card—we’re not quite northern enough for that. I mean WONDERland, like “I wonder if it’s going to be 60 and sunny, or if it’s going to be so cold the news anchors are telling me not to let my dog outside for more than 10 minutes.” So, let’s take a look at Missouri’s last few weekends.
Four weeks ago today I played in the 28th Annual Ice Bowl in Columbia, Mo. Columbia is not only my hometown, but the home of the original Ice Bowl in 1987. As we all know, the official Ice Bowl slogan is “No Wimps, No Whiners,” and for the 28th Annual there was nothing to complain about. The weather was beautiful, in the 40s and no rain or snow. I was very happy to be able to play in a division of 5 women, two of us celebrating one year since our first tournament! On top of that, I shot my personal record on the Oakland Top course with a 2 stroke improvement. It was a wonderful day!

Five ladies competed in the women’s division at Columbia’s 28th Annual Ice Bowl in January


The winners of each division at Columbia’s 28th Annual Ice Bowl
After such a great experience at the Columbia Ice Bowl, I was really pumped to play the following weekend in Jefferson City, Mo. However, the night before the tournament there was an ice storm and it wasn’t safe to make the 30 minute drive. Instead, I spent the day playing a 4-hole NOMAD course at my house and gathering with my neighbors to scrape ice off of my street. Not so wonderful.

NOMAD target set up in my backyard while the roads were too icy to get to a course

My street covered in ice, and everyone trying to get it cleared off.
I didn’t get any golf in the following weekend. There was more snow and I turned 21, so I think you can infer that I was a little busy doing other things…

Last weekend I finally made my way down to Jefferson City to play league at their new course. They still don’t have permanent baskets or tee pads installed, so we played the front nine twice with temp baskets. Just by looking at the front nine and hearing rumors about the back nine, this course is going to be a BEAST. There are a few water hazards, lots of elevation change, and a mix of tight tunnels and long fairway shots that have to be strategically placed. (It’ll definitely be worthy of a course guide when it’s finished.)
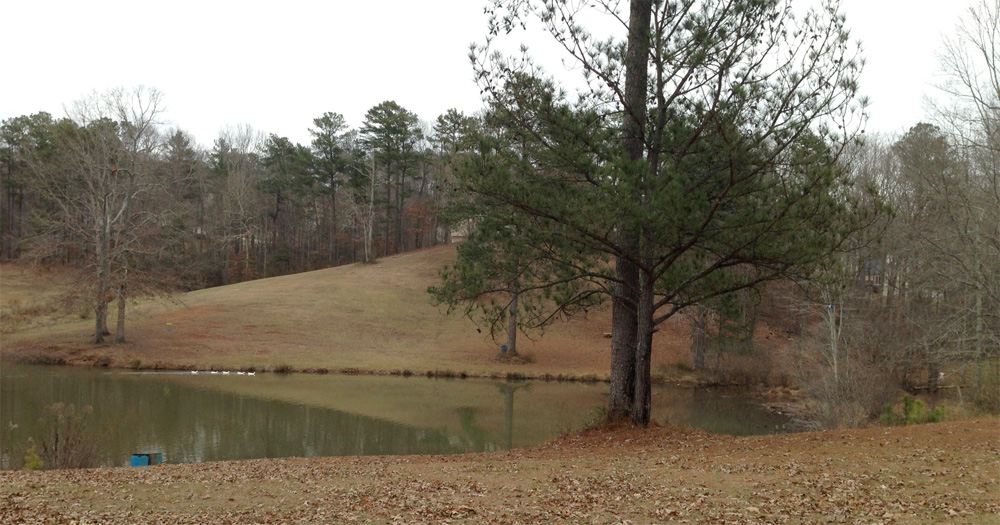
Although it only snowed a little while I was there, there was plenty of “leftover” snow on the ground, cause it hadn’t been above freezing in at least a week. The park’s namesake Binder Lake was frozen enough to walk on (although I never recommend walking on ice!), which is pretty rare.
During this round my winter weakness was particularly evident. I’m usually pretty good at not letting cold affect my mental game, keeping my throwing hand warm, and not letting my feet get wet. But the worst thing about winter disc golf is wearing so many layers that it limits my range of motion. For the most part it doesn’t impact my driving, but trying to follow through on a putt when I feel like the Michelin Man is just not going to happen.

Geese along the shore of Binder Lake, near Jefferson City’s new disc golf course

Jefferson City Disc Golf Club’s President Stan Balke putting from a tree on the new course

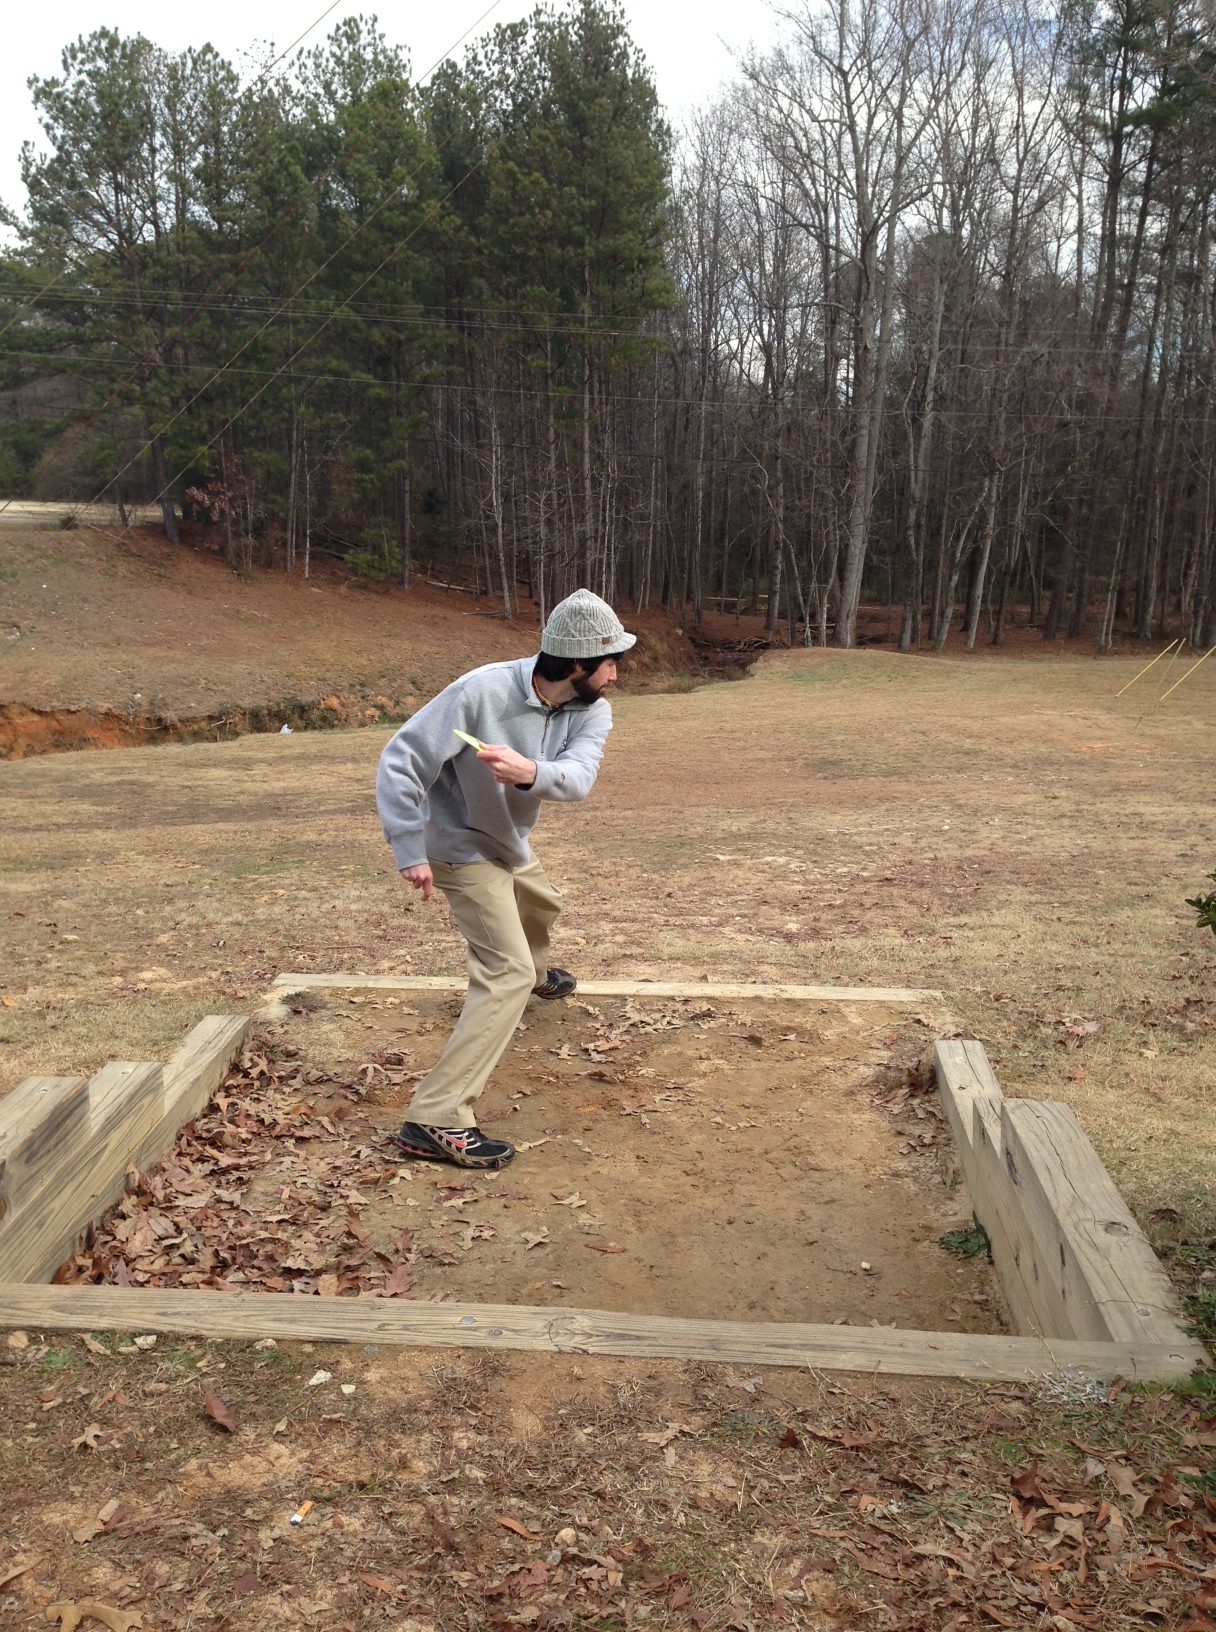
Me driving during league at Jefferson City’s new course
Just six days later, I played my first short-sleeved round of the year at Carrollton Park in St. Louis. It was a beautiful, sunny day reaching a high of nearly 60 degrees. Can you say complete weather 180!? Then, fast forward to today, when the high is expected to be only 38 degrees; my disc golf feat for the day will only consist of writing this post and wishing I were at the Gentlemen’s Club Challenge, where it is currently 65 and sunny!

Precarious basket at Carrollton Park in Bridgeton, Mo., a suburb of St. Louis
dgNOMAD New Logo & Glow Chains!
 This won’t be news to any of you who know JT here at Dogleg DG, but I’d like to let the rest of the world know that his design came out on top in the search for dgNOMAD’s new logo, and we think it rocks! Thanks also to everyone else who sent drawings, there were several contenders.
If you need need any logo or promotional work done you can stop looking, JT did an excellent job for us. From concept to revisions to final drafts, as well as staying in touch and putting up with my busy schedule, he was on top of it all. The new logo looks awesome printed in black on our red carry bags, and the color version does a great job displaying the “UV-ness” (JT coins terms as well as designs logos!) of our newest product, retrofit Glow Chains. Our Glow Chains snap easily to any existing basket or target in under a minute and give glow golf a whole new meaning! Check them out here .
And speaking of Glow Chains, if you’re in western Pennsylvania or Northeast Ohio you can see them in action at Young’s Run DGC during Valley DGA’s Glow Throw! The first of the monthly events is May 10th, check in a 7:00 for the first 9 and after dark the Glow Chains are coming out for the next 9! If you miss this one try back, there’s one every month May to November. More info at ValleyDGA.com or email info@valleydga.com.
Trevor at Valley DGA has done a great job helping spread the word on our new chains to some neighboring clubs, anyone else who is interested in a club purchase for glow leagues or tournaments (or just to get a discount!) should definitely let me know. Club orders get 10% discounts and free shipping, email club@dgNOMAD.com for details.
Last but not least, there’s still a week left before our next drawing, register to win either a set of dgNOMAD Glow Chains or one of our revolutionary ultralight portable NOMAD Disc Golf Targets! These little guys are under 3 pounds, available in 6 standard and 4 Glow colors, and let you take a target places you never thought possible…toss one in your backpack, on your dash, or even on your bike handlebars and you can throw anywhere! They have regulation size target zones, and in fact are the only PDGA approved Object Targets on the market. In addition to being made in the USA, our targets are economical so you can grab one for yourself and give the kids their own!
Enter the drawing for free stuff here.
Thanks for checking out our new product!
Jeff@dgNOMAD.com
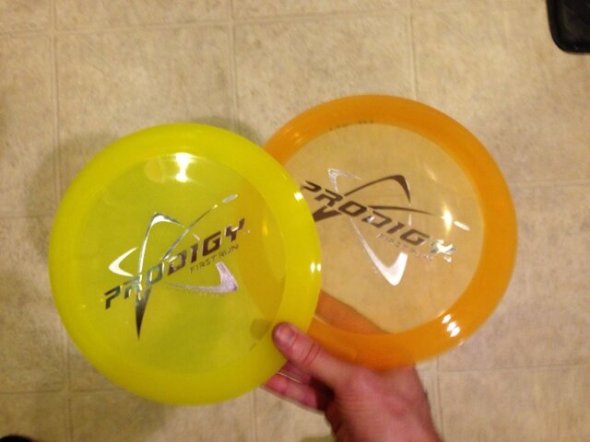
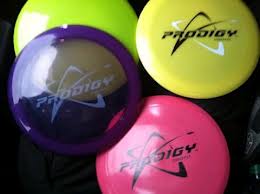
Prodigy First Run D1/D4 Full Review by JT
Alright guys, today I would like to take a moment and offer a more in-depth review of the latest Prodigy D1 and D4 “First Run” stamp discs.
Earlier in February, fellow Doglegger Jeremiah wrote a review on the Prodigy D1 and D4 “Proto” stamp discs here on the blog. Since, Prodigy has released the “First Runs” about a month ago. So I wanted to elaborate on Jeremiah’s review with a more in-depth look for the newly tweaked “First Runs”. In this review I will cover such characteristics as grip, look and feel, flight patterns and more. I would like to include several vid clips and pics below in the article that we took while testing these two discs out.
Let me preface this by stating that before I write any disc reviews, I will always take the disc out on the course multiple rounds and play several weeks with it first. I also normally test the disc at a few different local courses as well. This helps me get a better understanding of how the disc reacts in different weather conditions as well as terrain—whether it be open fields or tighter, wooded courses. I want my reviews to be fair, honest and from my perspective. Keep in mind this review is solely my opinion and does not necessarily reflect the same opinions of other Dogleggers.
The Discs:
About a month ago, I got a hold of both the new Prodigy D1 and D4 “First Run” discs from InfiniteDiscs.com. I was extremely ecstatic the day both arrived in the mail! I was like a kid in a candy shop. The wait was over. Ever since the D1/D4’s release, I had heard nothing but great things about Prodigy discs. I felt like I just had to have a piece of disc golf history (well I’d like to think anyway). Friends had told me the discs felt like no other plastic out on the market and even adding 20-30 feet to their drives. Seriously? A new brand of disc could do that? I was slightly gullible, so of course I was going to give them a try!
 Upon pulling the brand new discs out of the box, I instantly noticed a completely different feel to the plastic. A grippy coating unlike any other I had seen before—which I liked already. Now don’t get me wrong, I’m still not falling for any hype until I tested it myself. Let’s do this…[time-lapse]
Over the past four weeks I’ve thrown and tested out both Prodigy D1 and D4’s. I have finally gathered enough observations to give it a fair review. Daylight Savings Time had not yet switched over yet when I received the discs which meant it was dark already after I got off work each day. Ugh I hated it getting dark so early. I remember being antsy that entire week until the weekend rolled around before I could play. Finally, I could actually make it out during daylight hours to test them.
The Grip:
As I mentioned earlier, I was drawn to Prodigy’s grip right away. It has a solid firm feel with a good amount of grip on it. It seems like it would be a slippery disc with its translucent appearance. Innova Pro Katanas have been my go-to driver for the last three years. I love the Katana’s feel and the wider-rimmed edges which fit nicely in my long fingers. I was surprised to find that both of the Prodigy’s have a wide rim as well (According to Infinite Disc’s website, the Prodigy’s rim width is 2.3cm compared to the Katana’s 2.5cm). Could one of the Prodigy’s become my go-to replacement?
Prodigy is calling the grip on these two discs the 400 series. According to Prodigy’s website,
“The 400 series is a premium blend of material that is extremely durable. The unique blend of plastics feels as good as it looks and will be able to be broken in over time. This tour quality plastic gives the thrower better grip even when it is wet.”
A lot of high-speed discs are flatter and have sharper outside edges. Sometimes this sharpness can cut into your tightly curled fingers upon release..which sucks. But neither Prodigy did. Both of the Prodigy discs felt very comfortable with my grip (modified Split Power/Fork grip). The slightly taller height of the disc—compared to the Katana—helped it fit better and tighter in my hand. It also seemed to make it feel less sharp on that outer edge. Both discs are made up of a firm, very durable, high-performance plastic that feels great, but can it fly?
The Flight:
• First course test: Alexander Park DGC, Hole #3 (FYI, all Prodigy discs are stamped just up the road from this course at Disc Stalker.)
• First disc up: Prodigy D1
• Weather conditions: Overcast, mid-30s with 15-20 mph winds
The D1 is Prodigy’s very fast, overstable distance driver recommended for advanced players and power throwers alike. Infinite Discs rates this disc’s flight characteristics as 13|6|0|3.
The D4 is Prodigy’s most understable disc in their line. It is still a high-speed disc and not as understable as one might think. Don’t be fooled by its “understable” label. It is a serious disc that players of all skill level will enjoy. It flies extremely far and has lots of glide. Infinite Discs rates the D4’s flight characteristics as 13|6|-3|2.
OK, so my first throw with the D1 was terrible I will admit. Ha of course I’ll blame it on the wind all day, but it did soar out of my hand and straight into the treeline as a wind pocket lifted it high and right. The D1 is not a beginner-level disc by any means and does require a good bit of arm to get it to plane out like it’s designed too. I didn’t put near enough power into that one, so we’ll try again next hole.
The D4 is a lot more understable and seemed to us much easier to throw at first than the D1 did. Destin had the first throw with the D1 and actually did pretty well with it. You can see him in action on the short clip below on Hole #3 at Alexander Park. Listen to the wind in the clip; it was mid-30s with 15-20 mph winds that day.
It took me a while—even a few weeks later—before I could really get down the release throwing the D1. I kept switching up between the D1 and the D4 for much of the first round trying to figure which disc best suited my throwing style. I agreed with Destin that first round and more so favored the D4. It wasn’t as difficult to throw, but again it could have been a combination of several factors including the huge wind gusts, cold fingers and first time throwing the discs. I wasn’t going to give up on it though, I was going to figure this disc out one way or another.
As the day went on, I found myself leaning more towards the D4 with its subtle S-curve. The D4 felt more comfortable in my hand pressed against my fingers. The D1 seems to have more on an inner bead which had a bit rougher inner lip compared to the D1. That day I just couldn’t throw the D1 hard enough to get it to turn at a high enough rate of speed. It had a tighter fairway shot accompanied with a mean hook at the end which resulted in a big skip gaining me another 20 feet or so. It wasn’t until Hole #11 until I caught my break with the D4 (and longest drive I had all day) on a big shot down to the basket. You can hear the gusty winds in the background.
After a miserably cold and windy round, I still wasn’t completely satisfied that I had given the Prodigy discs a fair chance. I needed more practice, less wind and different playing conditions. Over a few more weekends worth of play, we tested the discs at Sequoyah Park, Oregon Park and Wills Park to help complete our review. The video below was taken on Hole #4 at Wills. Here I’m throwing the Prodigy D1. Now the D1 I had struggled with from the beginning because I couldn’t get enough arm behind my throw. After throwing it numerous times during several rounds, I finally figured out how I could tweak my own throw to compensate for its flight pattern. I loved its S-curve flight and big skip at the end. You can’t tell from the video, but the disc hits on the left side of the fairway and skips huge towards the basket. Not realizing how good of a shot it actually was, I was quite shocked when we approached the basket to find it lying about 10-ft past it on the bank. Yeaaa!
[Continue reading after the jump. You won’t want to miss =)]

My throw lands around 10-ft from the basket on the bank. Overshot it.
 Destin teeing off with the D4 on the same hole.
 Me with the D1 again (still frame from the video above).
 Destin on Hole #6 giving the D4 all he has haha.
Final Thoughts:
D1: This disc is not for beginners nor slow throwers.. It takes a lot of arm to really power this bad boy. Designed for power throwers, it has mad consistency in the wind and stays true to its path. I found that I could keep this disc’s flight a lot more level than the D4’s. Play the hook at the end to your advantage. Place it to where you can gain from the skip at the end. Although not a fav of mine out of the box, it has now become my preferred Prodigy driver. It took weeks of practice, but I have adjusted my grip and throw to compensate for this very fast, strong driver. This disc has replaced a few other long-time drivers in my bag and is battling for top spot against my seasoned Pro Katana.
D4: Don’t be fooled by this disc’s “understable” label. It’s questionable if that at all. This disc is much easier to throw than the D1, but I still would not call this a beginner disc. It, like the D1, is a Speed 13 driver which means it’s very fast and requires an advanced arm to huck it right. It has a beautiful S-curve and I love to watch this thing sail. It has a comfortable grip and releases with ease. I’m a fan of the high-vis yellow color too as it makes this a good disc for late afternoon/sunset play. If I’ve got a little more room to play with on a fairway, I’ll reach for this driver. You’ll find this disc as well in my bag at all times.
Unless you’re a power thrower, I would try the D4 first in a weight that is close to what you normally throw. Both of these discs I have been very pleased with thus far in the month that I’ve had them. Haha now I don’t have big arms by any means, but I do throw hard. If you have the power arm to control these, hands down they’ll add a good bit more distance to your drives. Depending on the hole, I’ve noticed an average of 20-50 ft added onto my drives. Earlier this eve after work at Oregon Park, I threw my first ever 350+ drive with the D1. The glide and s-curve on it was amazing. And too, I’ve hit a few trees with them already and still show no signs of nicks or cuts into the plastic. Solid made. I truly think Prodigy has indeed put out a high quality product that was well worth the wait. No wonder some of disc golf’s top pros have left their previous sponsors to join Team Prodigy. I look forward to their midrange Spring release!
Where to Buy! (promo code):
You can click here to purchase the D1, or click here to purchase the D4. *Right now they’re giving our readers a discount on their orders which include a Prodigy disc – so be sure to use code “DogLegDG” when you checkout!
Thanks for reading and go buy you a Prodigy today!
-jt
Course Guide: Jones West, Emporia, KS
I’m really excited to share with you all the first of many photo-based course guides I plan on creating. I got the idea to start these when I realized that many members of the Dogleg community would not have the opportunity to practice the courses for Amateur Worlds until they arrived for the competition. Since Columbia (my hometown) is only 3.5 hours away and St. Louis (where I go to school) is only 5 hours away, I figured I was in a great position to help non-Midwestern disc golfers prepare for such a big event.
But, making a trip to Emporia was easier said than done. I sat on the idea for a month or two before Adam and I decided Valentine’s Day weekend would be the best time for us to take a disc golf trip. (Jealous? Refer to my last post: Love Is In The Air.) After a few near-death experiences caused by our failure to realize that some highways outside of Kansas City were icy, we made it safely to my first Emporia course: Jones West.
According to Disc Golf Course Review, Jones West, an 18-hole par-54 course, was established in 1989. The topography has some gentle hills, but is mostly flat. After all, it is Kansas we’re talking about! Trees—ranging from broad and branchy evergreens to skinny deciduous trunks—definitely factor into the strategy on this course, but not to the degree that it creates the feeling of playing in the woods. There are two ponds on the course, which create water hazards on 5 holes. Each hole has two different pin placements, red and blue, for the Mach 3 baskets. (For more info: http://www.dgcoursereview.com/course.php?id=1403)
As with most other Midwestern courses, the difficulty will vary with different weather and seasonal conditions. Wind wasn’t a huge factor the day we played, but I’ve heard it can be pretty extreme in Emporia (there was a tornado nearby during the weekend of the Glass Blown Open last year). The seasonal changes to the course will be a little more predictable. Just like anywhere else, in spring and summer trees will be thicker and have more leaves; in the fall and winter they’ll thin out and leave more gaps. The size of the ponds will change depending on precipitation in the days and weeks before. This will cause the water hazards to be more or less extreme on some holes. (The water was pretty low when I took these pictures; there was a drought last summer, and the heavy snow didn’t hit until a few weeks later.)
After playing the course, we swung by the Dynamic Discs store and talked with Adam Searle. He said that all of the courses in the area will be getting new tee signs before hosting Am Worlds. (The ones they have at Jones West now are pretty nice, but several have been vandalized. I edited most of the vandalism out in my pictures.) As of my correspondence with Dynamic Discs on Thursday, I learned that Jones West will not be used for the Glass Blown Open this year, but it will be for Am Worlds. They are in the process of finalizing which pin placements will be used for the tournament.

Now that I have all the details out of the way, enjoy the pictures!

Hole #1: We played this hole in the red placement. For those of you who have played at Jones before, you may notice that the giant tree in the middle of the fairway (the one on the tee sign) is no longer there, which makes the hole play out a lot easier. Water shouldn’t affect you on this hole, even though it can be seen on the tee sign. Scores: Emily 4, Adam 3

Hole #2: We played this hole in the red placement. The road on the left is OB. Scores: Emily 5, Adam 2

Hole #3: We played this in the blue placement. Righties, beware of the road that runs down the left of the fairway, it’s OB! Scores: Emily 5, Adam 4

Hole #4: We played this hole in the blue placement. The fairway is gently sloped downhill. When the pin is in the red placement, water may come into play. Scores: Emily 7, Adam 3

Hole #5: We played this in the red placement. Scores: Emily 4, Adam 5

Hole #6: Based on the pictures I took, I can’t remember which placement this hole was in. Tee for this hole is right up next to the edge of the pond, whose width will vary depending on rainfall. I didn’t quite have the distance or confidence to go across, so I played around it. The top center picture shows the view from the pad. The far right picture looks back at the pad from across the pond. The picture across the bottom shows the length of the pond; you can see the tee pad on the left. Scores: Emily 7, Adam 4

Hole #7: We played this in the red placement. I didn’t get any pictures of this one because I ended up in the water (which shouldn’t typically happen for lefties, but I kept griplocking REALLY badly). Water will come into play though for right-handed hyzer shots if they go too long. Scores: Emily 5, Adam 3

Hole #8: We played this in the red placement. Scores: Emily 6, Adam 3

Hole #9: We played this in the red placement. The fairway is slightly downhill overall, with a drainage creek running across it. There is a cluster of skinny trees surrounding the tee pad, and a few larger evergreens guarding the basket. Scores: Emily 5, Adam 4

Hole #10: We played this in the blue placement. The big tree on the tee sign that used to be in the fairway is gone. It previously played as a mando, so the shot to the basket is significantly more open than it has been in the past. Scores: Emily 5, Adam 3

Hole #11: We played this in the blue placement. The fairway curves to the left for both placements. The green slopes down then back up, creating a bit of a valley. Scores: Emily 5, Adam 5

Hole #12: We played this in the red placement. The right side of the fairway is lined with trees; the left side is relatively open. The basket is within the treeline on the right, and is surrounded by trees on 3 sides. Scores: Emily 6, Adam 3

Hole #13: We played this in the red placement. The road on the right is OB. You can see that it is roped off on the edge of the pictures; the ropes are a few feet from the edge of the road. Scores: Emily 4, Adam 3

Hole #14: We played this in the red placement. The basket is tucked between two evergreen trees, and behind a smaller tree. Scores: Emily 3, Adam 3

Hole #15: We played this in the blue placement. The road on the right of the hole is OB. Past the evergreens on the left is wide open, in the event a shot doesn’t land in the fairway. Scores: Emily 5, Adam 3

Hole #16: We played this in the blue placement. I didn’t get any pictures of this hole because, for me, it was long and frustrating, and Adam’s shot didn’t turn over and landed in someone’s yard across the road. Whoops! Scores: Emily 9, Adam 3

Hole #17: We played this in the red placement. There is OB on both sides of the fairway (road on the right, houses on the left). Water comes into play for the blue placement, but not the red. Scores: Emily 5, Adam 3

Hole #18: We played this in a special placement that is usually used for Hole #1; it goes all the way across the pond and rests on the edge instead of being on the left side of it, as is seen in the red and blue placements. You can see the basket from the tee in the top picture, where it is to the right of the brown trees. The water makes this placement especially difficult. We learned from experience that, if faced with a difficult putt, it is vital to throw a shot that will not roll if it hits the ground. I ended up 50+ feet from the basket more than once on a roll. Also, for the blue placement, it may be important to know that the road is OB behind the tree line. Scores: Emily 11, Adam 4
Our One Disc Challenge
The Intro:
A few weeks ago fellow Doglegger, Destin, casually mentioned that we should battle in a “one” disc round at one of the local parks sometime soon. I had heard of people playing rounds with one disc before, but just the thought of being limited to only one disc did not sound fun to me. Even though I don’t carry a plethora of discs, I do like having options for different shot types I encounter. I’m always up for a fun, friendly competition so I took Destin up on the challenge.
What disc should I actually choose?
I wouldn’t say that there’s one disc in my bag that I would truly consider my all-around go-to disc. I do have a few that I throw often for multiple shot types, but never considered them for every single shot. I figured I could at least choose from some of those as a starting point. I knew we had at least one normal full round before the challenge, so I would take that opportunity to test some of those discs out.
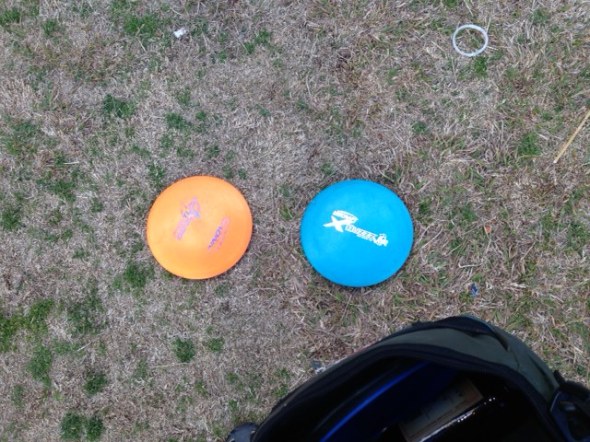
The Discs:
Some of the discs I tried out were my beat Innova Leopard, Discraft Zombee (2012 Ace Race disc), Discraft Buzzz, and my new MVP Vector. Here’s my little background history for each of the above mentioned discs:
Innova DX Leopard (weight = ~171g) – This is the oldest disc that I have. I’ve used this disc for several years now and have carried it in my bag ever since. If you guys have been following my posts, you know that I mention this disc a lot and actually putt with this thing instead of a true putter. From several years of throwing it, I seem to know its exact flight path for approach/putting. I’ll use it for anything under 150. It has become very understable over the years—especially at high speeds, so teeing off with this thing is out of the question. I also use this disc if I’m in the woods and need a good anhyzer disc to get around trees. This beat Leo has a wonderful, big s-curve at short distances when thrown at an anny.
Discraft Z-line Zombee (weight = 175-176g) – The first time playing with this disc was at my first Ace Race last summer. This 2012 Discraft Ace Race disc was recently named the Zombee. I immediately fell in love with this straight-gliding shooter with small fade at the end. It has a shallow rim and is cupped out making it easier to rest a finger on the outside of the grooved rim. This disc can really hold its line for me when thrown hard enough and finishes with a nice slight fade at the end. The longest approach/putt shot I’ve ever hit was made with this disc a few months ago at around ~125 ft. Still [knock on wood] no Ace to date, but the closest I’ve ever came to one was also with this disc from around ~180 ft that hit the center post and bounced back out of the front of the chains, AHH! During a normal round, this is my go-to midrange for shots 100-230 ft or so. I’ve never teed off with this disc on a hole further than 250, so not sure how well it flies at max potential/speed. I haven’t really found anything I dislike about this disc so far.
Discraft X Buzzz (weight = 175g) – I’ve heard and read rave reviews on Discraft’s line of Buzzzs, so I just had to get one and try it out. I got a great deal on one off eBay several months back. I’ve heard how well they hold their line and overall how great a midrange disc they are. I will break this disc out every once in awhile, but I’ll be honest and say that I still haven’t quite figured out its best characteristic. Maybe I should just use it more often to really give it a chance. I tend more to use this disc in practice or for ‘gimme’ shots when my game’s not on the line. But with having used that beat Leo and Zombee for most shots under 200, I haven’t found a good enough reason to switch to the Buzzz full-time yet. I am sure it really is a great disc though; I just need more practice with it. It does feel great in-hand and has that solid, sturdy feel to it.
MVP Vector (weight = 176g) – This is the newest disc in my arsenal and has already found a permanent spot in my bag. For a midrange, I can throw this bad boy further than any other midrange disc I own. I don’t know if you know, but MVP discs supposedly have GYRO™ technology which gives its flight path a more stable/balanced, accurate and consistent glide. The Vector is slightly overstable making it more wind resistance. I was surprised at the results the first day I took this disc to the course, for a midrange. If thrown at a little harder speed, it has a very long glide and little fade at the end. Depending on the type of terrain you’re playing, the Vector’s “grippy” rubber-like edge could prove beneficial. I find this disc to have less of a skip and more of a “magnetic” stop when it hits. It seems to grip better to the ground—great for approaches/putts.
The Fan Poll:
These four discs had their advantages and disadvantages on the course that day, so I was still unable to fully commit to any one disc right away. I thought to myself, Do I go with a driver that can get me further distances off the pad, but then suffer on putts because it’s overstable? or Do I go with a midrange and get less tee distance but comes with better chances of sinking approaches and putts? Ahh the decisions. So here’s what I did. I turned to our awesome fanbase (you guys) on both our @DoglegDiscGolf Twitter and Dogleg Facebook and posed the question, “If you had to play a full 18-hole round with only ONE disc, what type of disc would it be?” We received a lot of great response and I want to thank you guys for that! Here’s some of the responses…
Facebook Feedback:
Billy T. – Discraft XS
Trey P. – If the course is long a mid-range, Buzz. If the course is mostly shorter holes I’ve had success throwing my putter.
Manuel L. – A echo star boss
Dylan C. – Glow aviar putter!
Justin A. – MVP vector
Aaron M. – flat dx roc
Tommy J. – Valkyrie or a buzzz
Destin W. – Zombee!! (2012 Ace Race Disc)
Oscar J. – 173 medium neutron Ion – Yellow Green – my name and number on inside rim.
Alan M. – Boss 136g
Robert T. – i would use my trusty discraft buzz
Jeremiah B. – Definitely a Roc.
Twitter Feed:
@WolfPackDiscs – DX viper #innova #discgolf played many one disc challenges with it
@Restonification – Z Buzz. What else is there?
@MCW7979 – From what’s in my bag right now, my Star TeeBird.
@captain_jager – simple that would be a crisp wraith. You can do anything with that disc.
@BigAppleachia – My Lat64 AirSaint147. Its a driver w/glide does anything a mid can, and putts too! #discgolf
@Delt_Nikolas – Ti Buzzz. Buttery smooth.
Challenge Day:
The challenge day was finally here. This past Saturday, we met up at Oregon Park. It’s early afternoon and the temp’s barely breaking 40 (we live in the South now). Wind conditions looking less than favorable and peaking at 15-20+ mph wind gusts. Not exactly my ideal conditions for a first time, one-disc challenge. But lets do this!
After all the feedback from our followers, I decided to go with the one disc that received the most votes—the Buzzz. Heck I’ll give it a shot. My choice: 175g Discraft Buzzz, Destin’s choice: 169g Innova Star TL.
For this one-disc round, we moved up to the shorter pads to better our Ace chances with the unruly wind conditions. I think we both had a rough start getting use to just throwing one disc and unsuccessfully controlling its inconsistent flight paths in the wind. Hole #1 was a downhill shot, which was a great way to start any round. Those downhill shots build confidence in your throws when you can easily go yard off the pad. Once we got past the first three holes out in the open, the course takes a turn for the woods. Shielded by tree lines from the wind, I did much better with my drives from there on out. The likeability of the Buzzz was growing on me when the wind no longer became a major factor. I was finally figuring out how to hold it and throw it further and further with a few minor hand adjustments.
| Gotta love Georgia Pines…always making a mess and leaving tight shots. | 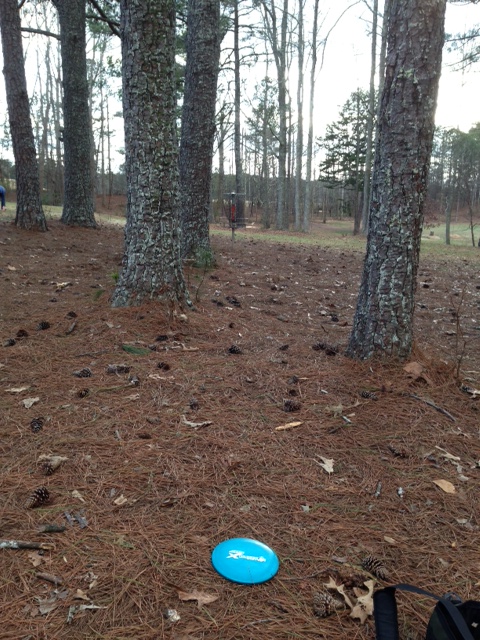 |
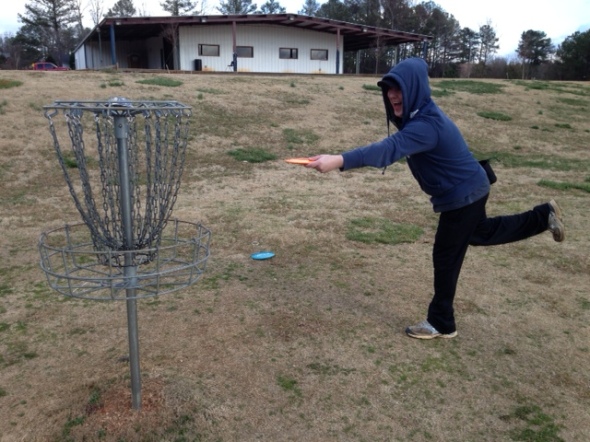
“Needle”ss to say, it was a tight race throughout the round. Destin was on a high for beating me for the first time ever earlier that morning in a normal round. We were neck and neck until he birdied one late in the round, going one up. Then it came down to the final hole. Uphill into the crosswind. All I needed was a birdie and I could have tied it up…or he bogey..or even double. Nope, he got the best of that wind on that last hole. We both layed up close to the basket leaving for a short par toss each. Well-played Destin, well-played. [Below] Destin acting estactic as he pulled off back-to-back wins that day on me. First for both haha. Besides the wind, had a great day overall. Fun times. I call rematch.
Feel free to comment below with your One-Disc Challenge experiences and/or your favorite all-around discs. Enjoy! —jt
follow us on twitter: twitter.com/doglegdiscgolf
like us on facebook: facebook.com/doglegdiscgolf
subscribe to our channel: youtube.com/doglegdiscgolf
dgNOMAD Glow Chains/Portable Disc Golf Glow Target Review by JT
Good evening!
Do you enjoy night disc golf? Have you ever wanted to get into night disc golf? Or do you simply wish you just had a super lightweight practice target that you could easily tote around and set up in minutes?
Just about everyone could use some practice on their short-game, right?
Well I might just have an idea—or solution if you will—if you answered “yes” to any of the above questions.
A few weeks ago I posted a teaser video for this upcoming review here on the blog. Let me just preface this by saying the filming of this 13 minute video review took longer than anticipated to cut, edit and produce the music track in it. But several weeks later and many late nights put into it, I can proudly say IT’S FINISHED!
Just in case you missed the teaser, the guys at dgNOMAD were grateful enough to send a set of their new UV Glow Chains for us to review right here on Dogleg. While I was at it, I also bought one of their Ultralight Portable UV Disc Golf Glow Targets to include in the review as well. Both of these products are awesome I must say!
OK enough of the suspense already, just watch the video review!
Once again, special thanks to Jeff at dgNOMAD for hooking us up and a BIG thanks to fellow Doglegger Justin for filming and producing this video. You guys rock!
To get your very own dgNOMAD Glow Chains or dgNOMAD Ultralight Portable Disc Golf Target, check them out at dgNOMAD.com. Tell them DoglegDiscGolf sent you! =)
-jt
follow us on twitter: twitter.com/doglegdiscgolf
like us on facebook: facebook.com/doglegdiscgolf
subscribe to our channel: youtube.com/doglegdiscgolf
Prodigy D1 & D4 Review
 |
I will use the post to drive more user feedback. Take my brief review with a grain of salt, as I was forced to play with my non-dominant hand… still recovering from shoulder surgery. |

Most, if not all, proto D1 & D4 discs currently come in max weight. The D1 is meant to be very fast and over stable, without the dreaded meat hook at the end. The flight path was narrowed significantly… reducing the side-to-side travel down the fairway. The inner lip has been rounded as part of Prodigy’s patented Easy Release Technology. The easy release is meant to reduce both grip lock and blisters. (Soap Box Rant: Innova’s most recent production of discs (late 2012) has a micro-bead on the inner lip that is extremely sharp and difficult to release.)
I am consistently getting more distance (20-40 ft) on every throw with both the D1 and D4. The D1 flies over stable, as intended. Prodigy claims the D1 flies well into a headwind as it does with a tailwind. I have yet to play in these conditions.

The D4 is designed as a very fast, under stable driver. In my experience, this disc is not under stable. I would actually classify it as slightly over stable. Obviously, I am not getting a solid pop on my release, but I was expecting something along the lines of a fast Innova Roadrunner or Mamba (Definitely not the case). I figure a 150 class disc will make the D4’s alleged under stability more apparent.
Overall I am happy with the purchase and look forward to throwing more Prodigy plastic. Both of these discs throw very well and get max-d with every toss.
What are your comments / reviews?
– Jeremiah
Golden Retriever, Not Always a Man’s Best Friend


Today I’m reviewing the “Golden Retriever” by Disc Diver. I bought a “Golden Retriever” about two years ago after I started losing more and more discs to ponds and lakes on disc golf courses that I was frequenting at the time. Reality is, losing discs suck. Especially on repeated occasions, because plastic “ain’t” cheap. I had even switched to discs such as Innova Dragon’s that float, but their super light 150g weight severely affected my distance from the box.
After multiple attempts with sticks, fishing rods and the occasional “swim” for a disc, I got tired of trudging through algae-infested mud-ridden ponds retrieving my weary discs. I knew there had to be a better alternative to fish out discs without having to actually swim with them in hopes to find my sunken disc and not catch some disease…
Then I found Disc Diver’s “Golden Retriever” and what seemed to be a clever invention–a disc retriever for discs sunken in the water. I watched the video on their site and was immediately sold. (Currently ~$25-30 on several disc golf websites out there.) I had just lost two discs a week earlier, so I was ecstatic about getting this thing in the mail. Almost considered rush shipping because I wanted those discs back that bad. Seems like a handy tool to frolfers everywhere, right? I’ll let you be the judge of that.
First you might ask What exactly is the Golden Retriever or How does the Golden Retriever work?
According to their website, DiscDiver.com, it is a fold-able device that’s “designed to retrieve sunken golf discs from the bottom of water hazards. It only takes a few seconds and is exceptionally easy to operate. The Discdiver ‘Golden Retriever’ is small enough to fit in any disc bag or back pocket.”
- Simply tug on the Golden Retriever’s throw rope to unfold it.
- Then toss it beyond the golf disc and pull across to retrieve.
- As it skims across the bottom of the hazard, it will scoop and retain the disc.
Seems easy, right? The concept of it is, yes, a fact very easy. Actually successfully throwing it and retrieving the disc? Not so much. Now let me explain; and this is why I named this post the way I did.
The Disc Diver “Golden Retriever” only successfully works under very specific conditions. If you watch the video on their site and notice, you can clearly see the disc sunken in the bottom of a shallow creek. The “Golden Retriever” works really when you can actually see your disc. I don’t know about you guys, but the ponds and lakes around here are both murky and have muddy bottoms. You’re S.O.L. trying to use one of these things around here as you throw blind into the water. The “Golden Retriever’s” back bar frame is barely as wide as the disc itself. With that said, you must have the “Golden Retriever” lined up almost perfectly behind the disc as you drag it over it. Just think if you can’t even see the disc?! Now you understand.
The goal is to throw it so it lands behind your disc. Let it hit the bottom, then carefully drag it towards you as you pull on the supplied 15-30 ft. line (TIP: Make damn sure you have the other end of your line tied to your body or bag. I’ve thrown the whole thing—line and all—into a pond before and spent another 30 min trying to retrieve that too!). As the “Golden Retriever” approaches your disc, the lip of the frame should catch on the underside of the rim of your disc. The disc somewhat “locks” into place in the back of the frame. Don’t try to lift up on it or you might drop the disc, just keep pulling straight towards you.

But what I’m not sold on is how effective it is in a variety of scenarios. Yes, it works wonderfully in a clear body of water with a smooth ground bottom. I would simply suggest actually observing the different bodies of water around your local courses before considering one of these. Like I mentioned earlier, here in the Southeastern states—where I play most of my disc golf–ponds are very murky, have muddy bottoms that often covered with algae, slimy plant life and debris. And I’m going to be perfectly honest with you; If your local ponds have any characteristics like the aforementioned pond descriptions, I do not see this product being of any help to you. Check out this picture to the side, this is what I “retrieved” with one throw into a disc golf pond while playing in Mississippi. If the pond has any kind of grass/weeds like that, there’s no way you’re returning anything that you hoped you would be. If you’re into kelp or need weeds for your home aquarium, go for it. =)

Another thing, this really only works if the bottom of the pond/lake/river is near flat. If there’s debris, large rocks, or limbs then you might be in trouble. The bottom floor needs to be near flat in order for the retriever to “scoop” up the disc. It does have a slight learning curve with getting it to fall and line up with your disc though. Don’t get me wrong, the “Golden Retriever” does have several great features as well as being super compact and portable! Its lightweight design has a high-vis color paint that helps visibility in slightly murky water. The ones I’ve seen online now actually come with up to 50 ft of line. Just keep in mind, it’s all about lining the retriever up with the sunken disc and being able to actually see the disc in the water. If these two conditions apply to your sunken disc, then you have a high chance of being able to recover your lost disc!
Honestly I’ve retrieved more of my friend’s discs than any of mine. It does work to a degree. I finally feel like I’ve gotten my money’s worth two years later. I take it with me every time I go out on the course just in case. But in most scenarios, this might not be your best friend when trouble arises.
Would love to hear anyone else’s stories and/or feedback if you own/or have ever used a Disc Diver “Golden Retriever”?
-jt
dgNOMAD UV Portable Target Review Teaser
Earlier this week I received my dgNOMAD Ultralight UV Portable Target and a set of Glow Chains for my DGA Mach Lite in the mail! Join some of the Dogleg Crew as we will be doing a full review of both of these products from dgNOMAD in another week or so here on our blog. Check out this quick teaser for now!
Enjoy!
-jt
Weekend Recap Part II: White Oak Park

Our disc golf-filled Saturday last weekend concluded with a trip to White Oak Park DGC.
After a successful round at Deer Lick [Read Deer Lick DGC Recap here.], the three of us headed down the road to the next course on our list, White Oak.
White Oak Park Disc Golf Course is a very large, open park with long, beautiful rolling hills located in Dallas, GA. It is one of my Top 5 Georgia disc golf courses that I’ve played around here. Although I wish it was a lot closer to where I live, but the experience and the views never fail me each time I go. Two things that really draw me to White Oak Park are: 1) Several elevated teebox areas set you up nicely for long, open drives to a downhill basket and 2) Signature Hole #17’s pond-flyover to a peninsula green [See image inset below.]
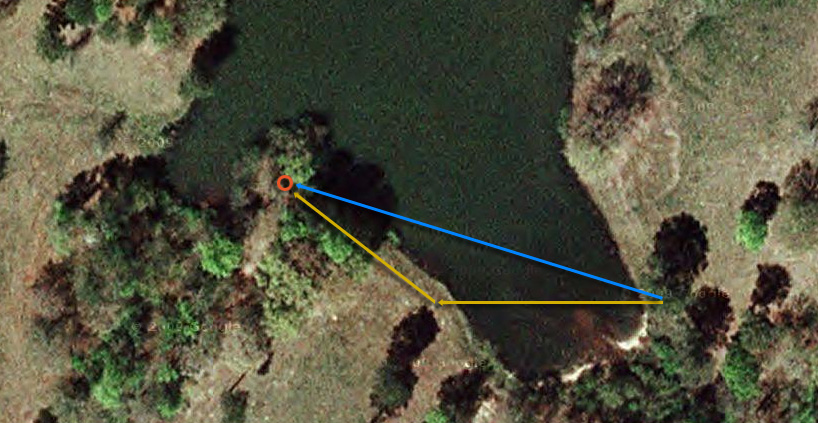
Signature Hole #17 at White Oak Park. Yellow line indicates roughly a 180-200ft shot over the pond. Or take your chances on the blue line with a 380ft shot to the bank in front of the basket.
Once we got there, the disc golf part of the park (in the very back) was nearly vacant. Awesome, for disc golf. We met up with fellow contributor and Doglegger, Destin here to join us for this round. The weather was nice, mid 50’s and overcast with little wind. I was a little disappointed to find out that the park had temporarily removed holes #13 and 14 due to frolfers disrespect to neighboring properties. I started off with a rough start dropping me to +4 after just the first 2 holes. I think I hit every tree in sight. I turned it on at Hole #7 with a short-lived birdie streak run. Pulled it back together at the end and finished at +5. Not bad for me for that course.
Here’s a look at some pics from that day at White Oak along with videos of our Hole #17 pond-flyovers! I apologize for the crappy quality uploads from our phone.
Destin launching a killer drive from atop Hole #8’s elevated teebox area.
White Oak’s Hole #17 — Looking back towards teebox.
.
.
.
.
*To read Destin’s White Oak Review and his tips on adjusting your grip and disc weight for winter weather, click here.
Weekend Recap: Deer Lick Park DGC

This past Saturday marked the first chance I’ve had this year to actually get out on the disc golf course. Prior to last weekend, I hadn’t played a round since being home for Thanksgiving. I was going through some serious disc golf withdrawals let me tell you. I normally play once a week. But with a strew of nasty weather, long work days, and being out-of-town on the weekends, I haven’t been able to.
Last weekend brought cloudy skies and milder temps reaching the mid 50s. Finally, it was nice enough to get out and throw. I had wanted to try a different course that I’d never played before. It’s a course that’s roughly an hour south of here called Deer Lick Park in Douglasville, GA. I actually tried to play this course last February when I just happened to be in the area. I only made it through the first six holes before calling it quits because I couldn’t feel my fingers any more. Obviously not dressed warm enough, temperatures were in the lower 40s that day with wind gusts near 20 mph. No condition to play in favorably. I wanted to give it another shot. So I called up the guys and it was time to roll!
 Deer Lick starts out with two shorter holes barely breaking 200 ft. With not having played in well over a month, I was pretty satisfied when my first drive landed within 15 ft from the basket and sinking my first bird of the new year. Hole #3 got a little more interesting when the length doubled from the previous two holes and ran parallel to a large pond on the left. Not only did you have the pond and increasing wind speeds picking up, the fairway consisted of varying tree obstacles and being completely on a downward slant towards the pond.
Hole #4 we got to tee off throwing around powerline support cables to a downhill basket tucked into the wood line which was protected by a small, winding creek [Inset on right]. The next few tinkered through the woods and then back out to a field and across the street. In the pic below is Justin with a long par save attempt on #7.

#8 introduced us to a 463′ long straight, slightly downhill fairway that ran parallel to a county road. The only thing stopping a wayward disc were two rows of 6’+ tall shrubs. All three of us landed near the road if you were wondering. I had a terrible drive when I released the disc too late which pulled it way left (I’m LHBH thrower). It went smack into the thicket and dropped at the inside edge. I had a killer approach shot from ~300 and parked it within 10′ from the basket…Not sure how that happened, but I’ll take it.

As luck would have it, my bro lands behind a set of trees on Deer Lick’s #13. You can barely see him through the trees. Up and over for par save? You got this bro! [Inset image above.]

As we got to the back 9, #15 was pretty interesting. A kudzu-filled hole. [Inset image above.]
I really enjoyed Deer Lick Park. It sets less than 5 min off of I-20 West coming out of Atlanta. Very quite and serene in the disc golf area, hardly anyone playing disc golf. I like the courses where we can play at our own speed and not have to wait on the group ahead of us. This course was built back in 1997, but it well maintained. At this park, there are ball fields, a gymnasium, batting cages, skatepark, mini golf, and whatnot! This disc golf part of it is mild-moderately hilly with a good mix of long open holes and tighter, wooded holes. I did pretty well and lucked up with some incredible approach shots. I finished at +2—not too shabby considering not playing for over a month and being a newbie to the course. We had a good time all around and was a great first round for me of the new year. I will definitely go back and play there again.
-jt
UP NEXT: WHITE OAK PARK: WEEKEND RECAP COMING TOMORROW, STAY TUNED!
Around the Rock: Disc Golf Game App Review
This past month and a half, I have been playing and testing out disc golf game apps for the iPhone. One of the latest ones I’ve been trying out is called Around the Rock Disc Golf Challenge by Tribaloid Games. I first found out about these guys through their twitter account, @ATRDiscGolf. Curious, I looked them up and found out what “Around The Rock Disc Golf” actually was. It looked like a pretty sweet arcade-style disc golf game from the few screenshots I saw. With the Daylight Savings Time ending and winter ahead, my discgolf-round-after-work would no longer be an option. I hate having to wait until the weekends to play now, but hey, I’m thankful that I can even do that! Anyways I was looking for an addictive disc golf app that I could play on these evenings after a long day at work. I had to check this one out.
At the time of downloading, I still had my old iPhone 3GS. I did not realize until later on that this game was optimized for the new iPhone 5. So I was confused when I first launched the game and noticed everything was blown up and hanging off the edges of the screen. How in the world was I supposed to play? Frustrated, I turned back to the app store to read the reviews/description for it and read that part about the optimization. Well, I was in luck. I had just so happened to upgrade to the iPhone 5 a few weeks prior and was waiting its arrival. So I wanted to delay this review until I gave it a fair shot on my new phone. Got my phone. So here goes..
Getting Started:

At the home screen I was welcomed with subtle animations in the background and NO music ambience—which I actually preferred. A previous disc golf game I reviewed had an annoying melody bit playing on the home screen that I was immediately put off by. Turn me off from the beginning and more than likely I’ll feel the same throughout the experience. So, yes, I was pleased to not have music on the home screen. A hovering, spinning island-like green in the air? This looks interesting. I’m hooked so far. Let’s start with Practice mode (and it says “Make Aces”..I like the sound of that).
First pop-up, instructions, YES! I’ve find the lack of this often in games and apps. I need to know how to play! So where’s the instructions?! Ya know? Usually it’s tucked away somewhere or not even there period. I was glad to see instructions popup immediately without having to search for them. I felt like they could have been a little larger on the screen, but at least they’re there. Oo I like this screen—definitely the arcade look, but this looks like the ultimate “disc golf dream”…Disc Golf Heaven?
Prepping to Throw:

Subtle wind noise, birds and crickets chirping fill the air. The blue compass indicator at the top of the screen is your directional pad/aim. Move this around to adjust for the wind and height of your throw. Next, you need to figure out how much power/disc you will need for your shot. This is indicated by a vertical scroller bar on the right side of the screen. Slide your finger up and down this to adjust the level of power. The lower the slider bar is, the lighter and less power (putter) the shot will be. For a driver, raise the slider bar towards the top. Anything in the middle would be like throwing your midrange. Pay attention to the distance to the basket in the bottom right of the screen. This will help in determining the amount of power you’ll need. I like how the location of the basket is indicated with rotating skyhigh yellow vertical lines. It’s easy to see way off in the distance (and times that the basket is located behind trees that block your line of view.) To actually throw, hold your finger on the red disc then quickly slide your finger up towards the top of the screen and release! Figuring out the windage, amount of power, and release point will take some practice. I like how it involves some physics and math so you’re not aceing every shot. If it’s that easy, what fun is that?
Ok I think I’ve got my throwing down for the most part, now let’s go try this Tournament mode. Wait..how do you quick Practice mode?? I’m only like 8 holes in. Do I really have to finish all 18 just to get back to the main menu screen? I don’t like that part of it. There should be an in-screen menu icon somewhere that I can click to easily quit. Please let me know if there is and I’m just overlooking it. Anyways, I had to double-tap my home button to get back to my phone’s home screen, close out the app, then restart it.
 Approach Shots: Now in Tournament mode, let’s discuss approach shots. Approach shots are set up just like your teepad shots. You have your wind indicator, power meter and distance to the basket showing. Depending on your tee shot went and the distance left to basket, you might need to power down on your power meter indicator. This is where you might need to move the indicator bar closer to the middle for a mid-range throw. Pay attention to the wind direction in relation to your basket position. Unfortunately I had a bad tee shot, which left me sitting right behind a big tree. Luckily the wind direction is in my favor so I’m going to angle this one up and to the right to allow my disc to curve around the tree back towards the basket. |
 Before teeing off on the next hole, pay close attention to the hole overview in the upper left corner. Most holes have multiple “floating islands”. You must land on one of these or else it’s Out of Bounds! Sometimes you will have to lay up because a full power throw might not necessarily get you to the second island. On the hole overview, you can see your current position indicated by a red dot and the basket’s position being a yellow dot. |
Putting:

Much the same as the first two, except for close-range shots you will need to downpower your throws and aim. The aiming target arrows place more eye-level with the basket. Adjust for slight windage if necessary. Pull your power level indicator bar almost all the way to the bottom to use your putter. Aim and fire away! Hopefully you heard chains on that one.
Try your best to stay out of and away from trees. I did notice a glitch when you land right up on a tree. Sometimes your next shot, the tree will cut into your view of the disc/basket. Gameplay-wise it won’t affect your throw, but mentally you’ll be throwing to a blind target.
Graphics:
I really enjoyed the arcade-style of the game as well as the graphics. Funky trees and funky floating islands make for an enjoyable sky-high, disc golf adventure in the clouds. Big plus on the rotating, tall yellow vertical beams that surround the hole. This makes it much easier to find the basket on those twisty holes with towering trees. I even liked the added “wisp” wind trail that follows the disc after each throw. And of course the added instructional graphic at the very beginning was a nice touch.
Sounds:
Like I mentioned earlier, very glad to not hear some cheesy intro tune at the main menu home screen. Sound effects sounded pretty good throughout my playing experience. During gameplay there was the subtle wind noise, birds and crickets chirping in the background which made for a nice outdoor ambiance. If I closed my eyes, it truly sounded like I was outdoors playing DG at my home course. Kudos there. And the sound we all love to hear, the rattling of the chains.
Summary:
Overall I very much enjoyed this disc golf game. It’s what I would consider to be the first arcade style of disc golf game that I’ve played/reviewed. It is challenging to say the least! I like having to guess how far my throws will go with the power indicator. It’s measured on a 9.6-12.5 meter—which I still not sure where that number range came from. Trying to figure out the right power level and correct aim will always have you coming back for more, practicing and honing in on your skills. It’s addictive enough because it’s challenging. I don’t like anything too easy, because one you beat or do awesome, then what?
My final thoughts to these guys that I feel did a really good job on the game! I feel like these few critique tips could help really put their app over the edge.
– Larger instructional graphic. There’s plenty of space on this screen that’s not utilized for the sake of the actual instructions. Having an iPhone 5, I found some of it difficult to read clearly.
– An in-screen menu. There needs to be a way to quit the game when you’re in Practice or Tournament mode. I don’t think you should have to finish all 18 holes just to get back to the main menu home screen. Hopefully, it’s there and I’m just overlooking it.
– Stuck in the Trees/View Glitch. I don’t know if there’s a way to fix this or not. But when you land in/behind a tree, your next shot is blocked by the limbs cutting into the disc/view of the basket. Nonetheless, it’ll teach you to stay as far away from the trees as possible!
-jt
» Go download Around the Rock Disc Golf now in the Apple Store for only $0.99!
Like this review? Be sure to check out our other disc golf app reviews here!
Innova Disc Golf Baskets: Which one is best for you?
Hi everyone! This is a guest blog post from Explore Disc Golf, a full-service disc golf design-build firm based in Western Massachusetts. We at Explore Disc Golf work exclusively with Innova Disc Golf products in our course designs, and took the time to take a look at the four types of baskets that Innova currently has on the market. While we install DISCatcher Pros at permanent courses, we have a fleet of DISCatcher Sports that we take on the road through The Mobile Disc Golf Experience, where we setup temporary courses at events up and down the east coast. DISCatcher Sports are wonderful for temporary courses and backyard putting, while DISCatcher Travelers and Skillshots are extremely portable for offering disc golf on the go. Check out some of the information we put together below and see what Innova Disc Golf basket is best for you!
Skillshot
 The Skillshot, with it’s tripod leg system, enables this lightweight basket to be situated on hillsides as well as flat terrain, something not seen in the following three models. This model of basket is best for those who are constantly traveling, as it folds down to the size of an umbrella, and can be easily stored in your vehicle. The basket weighs in at 26 pounds, and has 16 chains — in comparison to the Traveler’s 12 — and is approved by the Professional Disc Golf Association. This basket, however, does lack the professional appearance of a typical disc golf basket, and is best used for backyard play and integration into physical education programs. This basket retails for $129 and can be found online or at the majority of local disc golf shops.
DISCatcher Traveler
 The DISCatcher Traveler is Innova’s lightest basket, weighing in at only 16 pounds, and is terrific for disc golfers that are constantly in transit and looking to keep up with their thirst for the sport. Similar to the Skillshot, the DISCatcher Traveler comes with its own bag for easy transit. This basket, however, has the least amount of chains with 12, and is the least professional representation of a typical disc golf basket, although the dimensions are correct. This basket does have the ability to have mesh pulled around the chains to soft the sounds that so many of us love, but this is a plus for those who live in busy neighborhoods with neighbors right next door. The DISCatcher Sport can be purchased for $149, and while a sturdy basket for backyard play, we’d suggest that you spend the extra $50 and buy an incredibly nice basket in the DISCatcher Sport.
DISCatcher Sport
 Our personal favorite out of the bunch, we highly suggest the DISCatcher Sport for any and all personal use. It is very comparable to the professional appearance of the DISCatcher Pro, while being more than half the weight at 40 pounds and a price tag of only $199. These basket — similar to the Skillshot and DISCatcher Traveler — have no way of preventing theft since they come with portable bases only. That being said, we at Explore Disc Golf, have found a way to secure the baskets in cement footings for temporary installation at events and locations like campgrounds, churches and schools. If you’d like more information, or to purchase one of these secured baskets, please contact us at info@explorediscgolf.com. With 18 outer chains and a small yellow band for visibility, this basket is extremely comparable to the DISCatcher Pro and a wonderful addition to backyard. This basket is admittedly less portable than the previous two baskets, but can still be broken down and stored away to the size of the tray, while the 40 pound frame can still be lugged through the woods as a single entity for friends that want to create a disc golf course on the go.
Innova DISCatcher Pro
 The DISCatcher Pro is best suited for permanent courses. Weighing in at 85 pounds and costing the client $425 for a single basket, these high quality, durable baskets have 28 chains; bringing enhanced catch-ability with 14 outer chains, 7 intermediate chains and 7 inner chains. Clients can pick these basket up for $325 (plus shipping) per basket if you order 9 or more baskets, so if you’re looking for a single practice basket, this may not be your best bet. DISCatcher Pros do have a portable base (as seen in the picture) but are primarily situated and secured in sleeves that are concreted into the ground. This enables the client to easily move the basket to alternate sleeves on a hole to reduce compaction in any given area, while increasing the variety of the hole for players. A wonderful basket any way you slice it!
———————————————————————————————————
If any of you folks out there have any questions about Innova Disc Golf baskets, please get in touch with us info@explorediscgolf.com or check out our website at www.explorediscgolf.com. Our most sought-after basket is our modified DISCatcher Sports where the baskets have 6 additional interior chains and are capable of being secured in the ground to prevent theft.
Explore Disc Golf’s primary services include Disc Golf Course Design, Site Planning Consultation and Installations, we also offer Course Improvements, Disc Golf Equipment Rentals and Merchandising — all done in house. We look forward to hearing from you and encourage you to check out some of our current projects on our website, ans sign up for our newsletter to stay in touch! Thanks for reading.
Mancation 2012: Denver Disc Golf (Part II)
Continued from Mancation 2012: Denver Disc Golf (Part I)
After Saturday’s windy experience and lack of elevation at Arvada’s Johnny Roberts DGC, I was a tad bitter with my Colorado disc golfing thus far. First of all, I thought Denver was mountainous and had a lot more hills than it turned out to have. I expected Colorado disc golf courses to be filled with firs, spruces, and aspens, elevation changes, cool breeze and impeccable, breathtaking scenic views. Don’t get me wrong, now the Johnny Roberts course was indeed fun, but it was just not the scenic course I was hoping for. We needed to find a bigger, better course before this trip was over.
Then I remembered back a few weeks prior to our trip, North Colorado Disc Golf (@NoCoDG) tweeted us and mentioned that we needed to get up in the hills—that that’s where the bigger, better courses are. We researched that night and found out about Conifer Park at Beaver Ranch. The only problem?, it was about 45 min north of Denver and we had no car. After calling around town, we luckily found a car rental place that actually still had cars available. [There were several big events and conferences going on that same weekend, so it was hard to find any still available.] Locked it in for Sunday, check. Now we’re headed to the Mountains, boys!

Goodbye city. Hello Mountains.
Conifer Park at Beaver Ranch (Conifer, CO)
The whole drive up to Conifer was really nice. The Rockies—once off in the distance—were finally now getting closer and closer. Steeper inclines ahead as we winded up the hills leaving the city behind. The directions we had were horrible..or either it was that stupid GPS. Either way, once we got off the main road it felt like we drove in circles for a half hour trying to find one little road. I don’t know how many times it redirected us after we’d make a turn. The address on the GPS took us up one hill into this mountainside trailer park. Yea…don’t think there’s a disc golf course in this mess. “Heya Billy, 2 points if you ding one off da satellite dish into the plastic kiddie pool.” Yea..no. Ok after a different address confirmation, we’re back on track and finally get there. It’s already starting to look and feel like the “Colorado Disc Golf Experience” I was hoping for. Beaver Ranch is located down a long dirt road with a small dirt parking lot at the base. There to the side is a small cabin store-looking thing that reminded me of what you’d see atop a mountain while skiing. It is cool out, light breeze and the air is thin. Then you catch the subtle scent of the mountainous, evergreen air. Yes, this is it.
 Some locals pull up about the same time we do and tell us Hole #1 is about a half mile from the parking lot.. Half a mile, seriously? Gees. That first time you know how it always seems like it takes forever? Well we walk and walk—crossing an overgrown, brush-filled creek. I’m talking thicket so thick, there could be bears hiding in there.
We get to #1’s teepad and the excitement and thrill level could not be any higher! This was intense. Hole #1 is straight uphill? Yes—with a very tight, heavily wooded fairway window staring right back at us. Hole #1 you’re basically teeing from ground level and throwing high and up into the mountain. Leaving no room for error, the first hole was a little intimidating. With the majority of us being from the Southeast, we’re not used to this level of drastic elevation change on the holes to follow.
There was a courtesy box and sign at the bottom of the wooden stairs leading up the fairway to basket #1. This was to put in your $3/per person (highly worth it) and grab a dated tag for the day’s round. After teeing off, the elevation change kicked in. I believe Tim was the only one that had a decent tee shot on this hole. On our next throws, we found ourselves fighting for a steady balance along the hill’s steep incline. I’m glad the day was cool, because with all the hiking/climbing we were about to endure, it could have been miserable.

Joe at Teebox #1

Joe Approach Shot on Hole #1

Basket #1 looking down fairway to #1 Teepad
The first four holes you’re playing your way up the mountain. So each hole the hike gets a bit more strenuous and the air gets thinner. Beautiful views of the trees and mountains off in the distance as you play. Tight cut lines surrounded by tall, thin pines and firs filled the landscape. Didn’t see any wildlife, but loved the nature sounds. I also did like how there was not a lot of small plant life around. This made it much easier to find your disc in the dirt or pine straw. Really the only thing you had to watch out for was if your disc became a roller and rolled off course…and down the hill. On Hole #10 I believe it was..we searched nearly a half hour for one of mine that skipped and rolled away. One of the zipline guides actually spotted it for us. Whew, did not want to lose that one. Oh and Yes, they had ziplines (next time I’m adding that to my list)!

Hole #2 Basket

JT on #4 Teebox

Joe on #5 Teebox

Needed a breather.
After the first 7 holes (1/3 of the way done), we needed a breather. Lots of walking, hiking on this treacherous hilly mountainside already. I’m glad we brought all of the water and snacks that we did. Come prepared if you play this course! Especially with this tight #8 (pic below) coming up, we needed to think about just how in fact we were going to pull off this next laser drive. It required roughly a 100+ft straight shot just to clear the tree line with literally less than a 15-ft window to work with. Here in the pic below, Jason’s eyeing the fairway leading up to the basket. Throw it soft to lay up and keep your line? or risk pinballing one through the trees and down the left side of the hill with a burner? Decisions. I’ve scored par on every hole up to this point and up by several strokes, so what do I have to lose? I’m going for it, son. Indeed did hit a tree or two, but would end up serving me well on this one.

Hole #8 Teebox and view of mountain from basket.
I managed to hang on at even par through the first 9, then I started to fall apart…as did everyone else. I would go on to bogey the next 6 in a row…ouch. The holes were getting longer and more difficult. We were feeling the burn from all the walking/hiking and arms were getting sore after the next handful of holes.

Jason about to ding the top of the #12 basket on a 310′ shot.

Basket #13…Anthill Mound. Unforgiving to say the least.

See the basket? Neither do we. But it’s in the midst of the Aspens in the back. #14 Approach Shot
I feel like we’ve been playing across the top of this mountain for hours. Isn’t it time the holes start making its downward spiral? Yep. Here goes. Hole #17 was a beast of a downward distance hole. This hole is some odd 430’+ long, but you’re pretty much teeing off from on top of the hill aiming to a downward basket. With a steep incline directly behind the pocketed basket, you could huck the hell out of your disc and not worry too much of overshooting the hole..As long as you angled it downhill. My goal, spike it in the hill behind the basket. Or at least hit it hard enough it would catch an edge and roll down to the pin. Check out the view from the teebox down to the basket.

JT on #17 Mountain Teebox to Downhill Basket. Seeyahhhhhhhhh. Bomb.

Tim bombing one at Hole #17. 435’+ to downhill hole.

Jason on #17 Teebox

Tim sinking a solid on #18.
Then the rain came. And it fell hard! With nowhere to go, we found slight shelter under some low-lying branches. The next few holes we played in the pouring rain. We were this close to the end—can’t stop now. Conifer Park is made up of “21” holes, but could not seem to find Hole #21. Hole #20 was a steep downhill hole with a heavily-wooded line to the basket. This hole you needed one to lay low and set down or your disc might be rolling all the way to the bottom off the mountain. There was one last teebox after Hole #20, but was not designated by a teesign. Could this be #21? It was long and far and required throwing over that overgrown, hellish creek I mentioned earlier. And the bad part about it? The creek lied maybe 50-ft in front of the basket. You either had to lay up before the creek, or bomb one hoping to land on the other side. We turned this into a CTP hole instead.
Course Recap:
All in all it was an excellent course with 21 beautiful holes. By far, the absolute BEST disc golf course I have played yet (yes, even topping Flyboys). Conifer Park at Beaver Ranch has the whole package. You’ve got the cool weather; the beautiful scenery; the mountains; the tall-standing thin trunked trees; challenging elevation…everything. This course is not for the beginner nor would I recommend for people out of shape. It’s rough. It demands lots of stamina, walking and hiking up steep terrain. Some holes have loose footing on the dirt and straw on the hillside. Bring LOTS of water/snacks. You’ll be out here for a few hours with just the amount of time to walk the entire course. It’s challenging and I loved every minute of it. I would catch myself taking in the scenery and snapping pics and missing some of the great shots we made. Ahhh if I just had some of those on film. No aces, but a few close ones. I love the outdoors, nature and I certainly love the mountains. This course made my “Colorado Disc Golf Experience”. It was everything that I imagined disc golf in Colorado to be like. I would’ve been highly disappointed to make it all the way out here from Georgia, and to have not gotten a chance to play something of this caliber.
Course Rating: 9.8/10
If you’re ever in the Denver area, you have to go play this course. Set aside a few hours to play..and of course, transportation to get there. Like I mentioned earlier, it is a ways out of the way but you will not regret it. No wonder it is rated a 4.6+/5 on DGCourseReview.com.
For a full look into our Denver Disc Golf Experience and over a hundred more pics, please check out our Dogleg Flickr page.
If you liked this post, don’t forget to “like” it and share below! Thanks guys!
-jt
Night Rounds – Reviews on glow sticks, LED Lights, and Glow plastic
With the impending time change, night golf will be our only option if you work traditional hours. I have used mini glow sticks, flashing led lights, and glow discs as my test subjects for when day light savings goes into effect. The mini glow sticks work fairly well if disc is almost clear. Any slight tinting of the plastic will drastically reduce the visibility of the low powered mini glow sticks. I’ll give it a 2 on a scale of 5.
The flashing LED lights have been my staple for the past year. They are roughly $2.50 ea and give roughly 12 hours of use. These are the best option of the 3 test subjects. They are the heaviest of the addon options but they work well in all lighting scenarios (ie low sunlight, dusk, and completely dark). The newly redesign 2 alternating color lights that emit a combination of Blue/Red, Blue/Green, Red/Green colors for very easy identification from a far. Dynamic Discs seem to be the main supplier of this particular light setup. I barely notice the LED taped to my discs, but I don’t try any crazy hyzer flip shots at night, much. I highly recommend these particular models and give them an overall rating of 4.5 out of 5. I’ve dinged the 5.0 rating for the weight weenies out there. =)

Lastly I have tested the Innova CFR glow discs, Innova Pro Glow, and the GatewaySuper Glow plastics. one of the problems with glow plastic is that not all the names are available in glow. Innova probably has the largest selection of glow plastic but its still limited compared with their full product offering. The less translucent discs seem to hold a glow longer than the more translucent. That being said the Innova Pro and Gateway Super Glow outlasted the Innova CFR’s. All glow plastic seems best suited for near zero visibility. Any close street lamps will drastically reduce your night vision and the perceived glow from the discs. LED Blacklight flashlights tend to be the best option for charging this plastics in between rounds. I picked one up off ebay for around $13 shipped. My rating for the glow plastics is 3.5 out of 5 mainly due to the limited disc option in glow plastic and the fact most of my dg gets played around dusk and street lamps. All the above plastics are perfectly suited normal daytime use, as the Innova CFR plastic has excellent durability. Hope this helps someone!
Below is picture of a fresh charge on the 3 plastics in a completely dark room. They are visible for 10-15 minutes in a zero light area.
Jeremiah
Grip-and-Rip.com
The Importance of a Fairway Driver
After reading J.T.’s review of Legacy Park, I thought I would take the trip to Kennesaw and check out the lil’ 9-holer. The course is in a beautiful community that is extremely well maintained, but as you may have already read in previous posts, the course is private to residents and/or their guests.
I LOVED the little course, and it may be my number one favorite course in Georgia so far. BUT… I feel the reason may have been the day I chose to play Legacy. 68 degrees, perfect breeze, leaves falling and squirrels everywhere gathering for winter. It was simply beautiful disc golf or no disc golf.
The best thing about Legacy may be it’s downfall. It is extremely accessible to beginners and is certainly the course that hooks a newbie into the sport, but serious disc golfers may be bored with it’s mainly ace-able holes and lack of diversity on the land.
What this course is PERFECT for is working on your straight game, and I can’t stress enough the importance of a fairway driver. While not as fast as a distance driver, it will go where you put it without a lot of fade.
I throw the Innova TL, and exclusively threw it playing Legacy. I don’t know if I was just having a good day on the course, or the TL is truly amazing. I’m not a hard thrower, so it tends to go just as far as my distance drivers anyway, but it’s placement is reliable.
A lot of players think that throwing a distance driver means getting distance, but what may happen is they under power the disc and it doesn’t go any farther than a mid range would, and the disc dives to the ground where you didn’t want it. I’ve been there.
What I love about a fairway driver is not only how they fly, but how they feel. When I toss the TL, The grip is much more comfortable than a sharp distance driver, and it rips out of my hands with grace.
After having a wonderful day with the TL, I know what my go-to disc is now. The next time you need a straight beautiful drive, reach for your favorite fairway driver.
—
Here are a few pics from beautiful Legacy Park:


Pocket Putt: Disc Golf App Review
Welcome to another disc golf app review here at @DoglegDiscGolf. This is the second disc golf game app review this week. If you happened to miss the first review this week on iDisc Golf Pro, you can check it out here.
Tonight, we take a look at Pocket Putt disc golf putting game app by DiscGolf2Go.com. Pocket Putt is a laid-back, flick style of disc golf with photorealistic background graphics. It is available in the iTunes store for iPhone, iPad, iPod for $1.99 (Available for Android as well).

Starting Your Round:
Soon as this app loaded, I was little put off by the music. I thought I had downloaded a bowling game instead. Little jazzy maybe? I don’t know, I felt like I was in a lounge or a bowling alley. Anyway, I got a retro vibe from the start, even with their font choice for logo. I will get into graphics here shortly. Ok, let’s start.
From the home screen you have the option to either “Practice” or “Trial”. Let’s begin with Practice. I need to figure out how this game even plays, right? The next screen that advances is my course selection. There are four course selections are The Hills, The Grove, Open Field and The Pond. Ah there’s the button on how to play.
“The Hills” is first on the list, let’s go with that.
Gameplay:
At first glance, I was impressed with the background scenery. Extremely photorealistic, but surprised with what looked like a weird, cutout image of a basket sitting in front. After a couple of flicks, I realized that this game reminded me yet of another game by how you flick (throw) the object and the flight pattern that it took…the classic, Paper Toss. Yes, you throw the disc by sliding your finger up the screen. The further up the screen you go, the harder/further your disc goes. Pretty simple, huh? Way too easy, let me try another.
Next course I tried was the Grove; it says “Medium”. Ah ok, now the basket is maybe 3-4x the distance from me than it was on The Hills basket. After maybe 15 throws later, I finally sink one. But once you find that certain “sweet spot” on your screen of where to release your finger..you’re basically hitting chains everytime. Ok now that I’ve found the spot, too easy. I’m bored. Give me some difficulty! Next…

Let’s back back out and check out this “Trial” mode.
“Open Field” it is. Whoa, the basket’s moved back even further AND NOW wind? Seriously? That’s quite a leap from the “Medium”. Whatever, let’s do this. I also now see three discs that appear in that upper right corner. No instruction anywhere that tells me what that means. I’m guessing I get three misses. I shall throw and find out. First throw…holy crap that wind is strong. That’s more like hurricane wind if I’ve ever seen it. My disc went maybe 50-ft and the wind carried it straight off the side of the screen faster than I could realize what had just happened. Lost one of the discs in the corner, great. Disc down.
The wind not only changes for each shot, but also varies speed while throwing. Frustrating. My next—and last—2 throws were horrendous and my round was immediately over. More Frustrated. I go back in and give it another shot…about 10 more rounds worth; nothing. Now it’s just really pissing me off that the difficulty level changes THAT much from that previous level to this. I don’t want to say it’s impossible to hit one with varying high wind speeds from that far a distance, but it’s sure damn close.
I play a variety of games on my iPhone, so I consider myself to be somewhat well-rounded with different types of gameplay. But the more I played this course, the more frustrated I became. I got fed up with Trial mode and went back to Practice on this course. I felt like the more I threw, the worse I got. I was not making any progress in getting closer or figuring out any type of “sweet spot” to throw at and ring a few. I threw almost 50 times before I actually sank one… How much fun is that? Would you stick it out that long or would you give up? That’s my thought..
To me, Paper Toss is way more entertaining compared to this app. Paper Toss is fun because even the furthest paper basket is still make-able with higher wind speeds with some practice. I don’t know how you’re supposed to score high on this “Open Field” course with winds that strong. I found it near impossible to aim far enough to either side of the vertical screen to play the strong left/right wind directions. I would have liked to see slightly less wind on a closer placed basket (like on The Hills, maybe The Pond).
Graphics:
I give props for the photorealistic, beautiful scenery in the photos. Coming from a graphic designer, I appreciate the level of detail and photography that went into those background. However, I think it falls short on the “clipart”-looking basket with the cheesy black stroke outline around it. What’s up with that? It gives the whole thing this Hanna-Barbera cartoon look with the illustrated basket on top of a 3D realistic background. If they’re going for cartoon, have the whole game in that cartoon look and feel. But don’t mix 2D cartoon foreground elements with 3D backgrounds. It’s a clash of dimensional and spatial realities.
Sounds:
Besides the annoying lounge music on the home screen, I actually really enjoyed the nature sounds and the rattling of the chains when you sink one. I didn’t like hearing the “dink” of metal whenever I hit the side of the basket, but I appreciated the sound effect. Another annoying sound is that that you hear when you miss your third shot in Trial mode. It’s like some kind of horn sound that reminded me of an old arcade game.
Final Thoughts:
When I think disc golf, I think outdoors. Nature’s beauty. The elements. Realism. A rapidly-growing sport that’s evolving with today’s culture. Anything but corny sound effects on menu screens. I’ve noticed this often on a lot on sport games. I just don’t get it. You can’t call this an “arcade” game when you have that much realism and detail in the graphics. I may just be rambling, but if I have to leave you with something…I say, save your $1.99.
TIP: On the longer holes, I’ve found that a good rule of thumb on determining how much speed/distance to put on a throw. If you flick your finger upwards across the screen, stop it (release) about where the wind indicator is. I’ve rung a good bit more when stopping at that height on my screen. =)
-jt
Mancation 2012: Denver Disc Golf (Part I)
Whew, what a trip!
I’ll start with that. Months in the planning and almost as long to finally get a review up on the blog. This past Labor Day, several of the Dogleg crew flew out to Denver for a guy’s weekend full of local brew tours, good eats, and of course, disc golf.
There is soo much to cover from our trip that it’d take me hours to write up. So I’m breaking this trip review down into two parts to spare you all the details. I’ll sum it up the best I can and try to focus on mostly the disc golf part of it. At the end I will also provide a link to our Dogleg Flickr account so you can see most all of the pics we took from our trip (Special thanks to Jason for submitting his pics and for being the only other one to take a camera).
We had been talking this trip up forever it seemed, but just couldn’t get it all worked out on finding that perfect weekend to go that all of us could make. It’s always nice to get away from your local routine courses, terrain and weather and branch out to something new. Something far away that has very different terrain and weather conditions. Here at Dogleg, all of us share a strong passion for disc golf and (the majority of us) good beer. Where else has an excellent selection of both? Denver, Colorado. Home to several big beer names as well as loads of microbreweries. Not to mention all the disc golf courses!
With so many courses to choose from and so little time, I had to turn to our Twitter friends for Colorado disc golf recommendations. North Colorado Disc Golf (@NoCoDG) shot us back some of their favs which included Johnny Roberts, Badlands and Birds Nest. They also told us we should really go higher up in the mountains and play Beaver Ranch. One minor problem, we lacked a car. The closest course to our downtown hotel was roughly 6 mi away. Too far to walk and about a 45 min bus ride…exactly. We walked most places or either took the bus. Either one, it took forever to get longer distances.
Johnny Roberts DGC (Arvada, CO):
Saturday, we decided upon Johnny Roberts DGC located in Arvada to be our first course of the trip. We checked into renting a car for the day, but everywhere around was rented out. So we took to the ol’ trusty local metro transportation of the bus route. After waiting nearly 20 min for the bus to come to our stop, we were now on a 6 mi journey to Arvada. 45 minutes later, we were to our stop in Arvada.. Don’t get me started on local transportation.
Anyway, after walking a few blocks we come up on the park. Doesn’t look like the best part of town, but heard that we just had to play this course for the history of Colorado disc golf. A couple of people calling it the “granddaddy” of Colorado’s courses. You could tell. The park was crowded and the signage wasn’t real clear of where the start of the course was from walking up to it. Hole #1 you throw across an open field, which seemed a bit dangerous for other people and young ones playing around and running through it. There were a few holes where you threw across the sidewalk, which also seemed a bit dangerous to pedestrians and bicyclists. One of my favorites parts of the course early on was the creek that runs through the park. This intertwining–very wide, yet very shallow–creek became a great obstacle through half of the course’s fairways. Several holes had the pin placement fairly close to the edge of the water. I thought this was pretty clever and as it required much more accuracy in laying up on your throws.

Hole #2 Basket next to Ralston Creek
In general, this was a very tight course. It had several very narrow fairways off the tee pad with lots of trees and brush lining the sides. On the holes that had open fairways, you had to deal with pedestrians and young bicyclists crossing by as you were about to launch. I could see where people could get hit often. They had nice, concrete tee pads and decent signs on each hole. The sign’s graphics were a bit weathered, but were designed very well. Each tee pad sign had an actual photo of the fairway, prominent hole number, distance to each pin location, and an overhead graphic of the fairway. Awesome! But, it was a little difficult–once you got to the basket–to figure out where the next hole began.
[Review continued after the jump.]

Joe on Hole #3 Tee Pad

Tim on Hole #6 Tee Pad
Hole #6 was a longer hole and liked to suck discs into the creek off to it’s left. Not only did they roll into the creek, it left an almost impossible clear shot out through the thick brush. Here’s Joe tossing up towards #6’s basket.

Joe for Par on #6
Thanks to the tip from a few fellow locals, that there is no longer a Hole #8. Apparently Hole #8 line of throw used to cross back over Hole #7..all out disc war, right? Throwing towards one another and high speeds of spinning plastic. Hole #7 was neat too as you threw over the bridge down the creek line to a basket way off to the left alongside the sidewalk. Hole #9 was an Ace-able hole for sure. You tee off a slightly elevated pad and toss ~150 ft down to a lower pin placement on the edge of the creek. This is when the sandstorm hit. I mean hit hard! This is some of the hardest wind I have ever played in. The sky got dark and the wind blew furiously. Much of the course alongside the creek is dirt–which was where we were. I have never seen wind pick up dirt and blow it like that. It was ridiculous and you could hardly keep your eyes open but for a few seconds. Dirt, debris and leaves were flying everywhere. The wind storm lasted a good 15 or 20 min as we scurried as fast as we could through the next several holes. The wind in general made it very difficult to get in a good throw. Lots of our throws were picked up by wind changes and taken way off course. Bogeys and Doubles to follow.

Jason looking for his disc in a tree on #18.
The wind stopped, but the holes kept getting harder. More lines along the creek, more mandos, and tighter tee shots. Back 9 I fell apart and finished +7. All in all, I’d like to give this course at least another shot. Too crowded for me, but loved the challenging and technical game that it brings out of one. Not much for the scenery, I was expecting to be surrounded by more firs, pines and aspens..and hilly, mountainous terrain. I wasn’t going to stop at this course to my “Colorado Course”. I am, however, glad we got to play this one–especially to appreciate the history of Colorado Disc Golf.
Course Rating: 7/10
*CLICK HERE FOR PART II – CONIFER PARK @ BEAVER RANCH!
-jt
iDisc Golf Pro: Disc Golf App Review
About a week ago, I put out a tweet on our @DoglegDiscGolf account asking our followers what they would like to see more of on our blog. One of our Twitter friends suggested that they would like to see more disc golf game app reviews and where we see the future of these are going. I thought that was a great idea!
I have downloaded several disc golf games on my iPhone over this past week and have been playing each of them a good bit. These disc golf game app reviews will come in a series. After I have felt like I have played each one long enough to give it a fair review, I will review it on here.
The first one I would like to review is called iDisc Golf Pro by Hypergon Studios. They also have a “Lite” version that’s free if you would like to give it a run first. But honestly, I have a feeling that you will really enjoy this app. It’s really addicting, so I say go ahead and spend the $0.99 for the full “Pro” version. It’s well worth it.
Selecting Your Round:
You can choose between 1 or 2-player modes to start your round. The Pro version has six 18-hole courses that then lets you choose to play the front 9, back 9, all 18, or even just a single hole! I like that. For added difficulty, you can choose either to tee off from the White Tees or the Blues. I really liked the different course selections–everything from your urban course to desert to tropical to snow. It has every climate you can think of. So no matter what type of season it is, you can always be playing the climate of your choice. The six courses to choose from are Johnson Street, Sonora Sands, Tiki Island, Northern Exposure, Lakeside Landing, and Windy Gap.

Gameplay:
After selecting your round type, tees, and course, you are ready to begin son! So you are on tee pad #1, first either tap the fairway overview icon on the left or drag your finger around on the screen to aim your crosshairs in the direction you want to throw. Pay attention to the wind indicator in the upper right-hand corner. Once you have your aim down, hold your finger down on the disc. Then you’ll see these arrows pop up. These arrows show the potential flight path of your disc. To make it go in that direction, simply slide your finger as fast and hard as you can along that same line. The harder and faster you flick your finger, the more power behind your throw.
The lower left shows the par of the hole. The lower right shows what throw you are on. To it’s immediate left is the distance of the hole (and remaining distance to the basket after you throw). Remember you can check your lie at any time, by tapping the fairway overview graphic on the far left side of the screen.
Once you release, the disc will take flight through the air. A distance indicator will appear under the “Player 1” up top tracking your current throw. You do have the ability to hyzer/anhyzer some of your shots around obstacles. One glitch in the game is the “bubble” around some of these tree tops. You might catch yourself trying to throw over some of them and suddenly your disc hits this “bubble” around the top of trees/leaves and falls down to the ground. Also if you try to throw out of bounds, your disc will hit this invisible, vertical “wall” and will drop your disc straight down to the ground.

For your second shot, you might be close enough to the basket that you do not need to throw your driver again. If so, tap the left or right arrows in the middle of the bottom of the screen next to “Driver”. This lets you select either your Midrange or Putter. For this particular game, if you are within 130 ft, I would use the Midrange. If you are within 50 ft, go for the Putter. Remember to adjust your aim and watch the wind as it changes for each throw.
Watch out for water hazards, they will take your A game to the crapper in a heartbeat if you kerplunk a few plastics in the lake. These discs love to roll too, especially on hilly fairways. Keep that in mind when aiming. Try to land it on a flat spot. I had a couple the other day that rolled into the water after tossing upwards to an anthill type green/basket.
Don’t be afraid to go for it from way out. You will miss 100% of the shots you don’t take. What do you have to lose? It’s a game, and an addictive one at that.

Graphics:
This has by far the best graphics/interface that I have seen in a disc golf game app yet. For what it is, at $1, it’s pretty good. The discs skids on ice, tumbles off of boulders, and spins and flips as it hits the ground. Not the most realistic-looking action, but the concept was there—better than just sticking like glue to wherever it might hit. Love the interface, easy to use. Really good job on the graphics, guys! Especially the course loading screens; very cool.
Sounds:
Nice interlude during the main screens. I laughed at some of the sound effects as it hits the water, ice, trees, etc. But you can always appreciate the lovely sounds of those rattlin’ chains.

Quick Summary:
–Don’t waste your time “trying” out the Lite version. BUY THE PRO VERS! You know you want it.
-It’s only $1 for the full Pro version! Get it now!
-BEST disc golf game app I have played.
-Nice graphics and gameplay
-Well designed interface
-Six, very unique courses to choose from with lots of hole options
-Easy learning curve with challenging holes/shots
Weighing ’em in, Titanium (Plastic)
About a month or so ago I was on DGCourseReview.com and saw an ad banner up at the top talking about some new plastic called Titanium from Discraft. Does anyone know anything or have played with this new Titanium plastic? Is it stiffer than their other lines of plastic and/or comparable to Innova’s rigid Champion line of plastic? How about the weight, are they only available in the heavier sizes? I was curious and realized it was one of Discraft’s more premium plastics as it did cost a few extra bucks.
Honestly, I can’t even remember what store’s banner it was that it was advertising. Sounded cool.. but again that’s what I thought when I first heard about Innova’s Blizzard Champions. I still don’t like those. I have one and still don’t see any advantages to it. I can’t keep it out of the tree line because I turn it over every throw.
But, if you’ve hucked some Discraft Titanium plastic, let me know! I may give it a shot.
-jt
Cheers to Deer, a Legacy Park DGC Review
Now with the sun setting earlier than ever it seems, my disc golf adventures are being forced to the weekends. The closest two 18-hole courses from where I work are a mere ~30 minutes away. If I leave work on time, drive a half hour, I maybe have a good 7 holes in before I’m swamped with darkness and straining my eyes following my disc through the air down the fairway…or through the trees. Not worth it, especially when you spend more time looking for your discs in the dark than it did to play the first 5 holes.
But there’s Fall/Winter weekday hope. It’s called Legacy Park and it’s only 10 minutes away from my office. It’s only 9 holes, but it’s a fair course that’s very well maintained and landscaped. Biggest downside is that it’s located in a very nice Kennesaw neighborhood that’s technically only for the residents—unless you tag along with one.
It’s a great course to get in a very quick game after work that requires your short, technical game. Being in Legacy Park, you get a family friendly atmosphere as these 9 holes are laid out along the winding walking trail, nestled in the woods. I’ve played here maybe 5 times and every time I recall seeing at least one deer or more. Last month I played one evening around sunset and counted a total of 7 deer walking through different fairways; pretty cool! Ok, to the hole descriptions..
At Hole #1, there is a large course map sign. Pay attention to this as the course is poorly marked past this point. If you follow the walking trail, it will help you out if you’re looking for the next teepad. But don’t rely solely on this. Each “teepad” is marked by 6″ red pavers that are set in the ground. These are flush with the ground meaning you cannot see them from further than 15′ out or so. Keep your head down and look for the bare spots in the grass areas. More than likely, the pavers are set around that area and the grass is worn out from the disc golfers.
Hole #1 is tricky in that—for me being a lefty—it requires a hard anhyzer down the tree line. You tee off almost under a large overhanging limb and are required to curve it around the trees maybe ~270 ft. to a basket tucked approximately 15 ft. in a small cutout in the woods on the left. My suggestion, throw as far as you can and keep it wide in the fairway closer to the road. This leaves you a more open shot into the tucked pin position. If you hug it around the woods, you’ll more than likely have to throw it back out to the open, then turn around and throw back into the pocket. Another thing I don’t like is none of the teepads have teesigns with par/distance info. This is a fairly short Par 3 course with several Ace-able holes. This course will definitely test your precision and accuracy because most of the holes require tighter, straight shots through narrow fairways and low-hanging limbs.
PROS:
-Really close to work. Great for a quick 30 min. round right after work.
-Never seen it crowded.
-Wildlife! Good bit of deer around towards dusk.
-Several <270' Ace-able hole opportunities. Keep it low and straight!
-Improves your level throwing accuracy
CONS:
-Disc Golf Course for residents only. Find someone that knows somebody that knows somebody that lives there. Call ’em up!
-Only 9 holes
-Half of the hole’s fairways are actually the walking path. Watch out for joggers/walkers coming around the corner ahead of you!
-Course slightly difficult to navigate after Hole #1. Pay attention to course map on Hole #1.
-No teesigns. Pavers hard to see/find in the ground for first timers.
-Hole #9 ends a good ways from Hole #1. Requires a good little walk back to where you started from (where you parked)
-Parallel parking on side of road.
FINAL THOUGHTS:
-Don’t plan a weekend road trip to this course. Definitely play it if you’re local and/or know someone that lives in Legacy Park. Enjoy wildlife, nice landscaping, trickling stream and watch out hucking towards pedestrians!
-jt
Urban Atlanta’s Perkerson Park: Course Review
This past weekend I got a chance to play a course down in the city called Perkerson Park with a few friends. I really enjoyed the course layout itself, but as we finished, we each had mixed reviews. I’ll give my review.
I first came across this course a few months ago in a listing on DGCourseReview.com. I was doing a local search trying to figure out what all courses were located within an hour radius of where I live. Perkerson Park came up as one of them and also had one of the highest ratings of any within my radius. So I’m thinking Why haven’t I heard of this place before?. With a rating of a near 4 out of 5 on DGCourseReview, I thought Man, I’ve got check this place out! So, research I did…
Let me preface this by saying I’m not that familiar with all the different suburbs of Atlanta. After reading mixed reviews online, I was curious about where in Atlanta this course was actually located and it’s surroundings. The reviews online talked about how nice the park and the course layout was, but there were several concerns with the people that frequent the park. I even read where someone said that they carry a taser with them to the park…Now I’m thinking Oh gees, do we need to bring something? or yet even play?. We give it a shot. How bad can it be in broad daylight?
We get there a lil earlier than the others and we sit in the first parking lot for about 10 min. There’s a good bit of people around, maybe a reunion or birthday party. From the car, I’m not seeing where the first basket could be. I check the website on my phone and realized I need to be in a different gravel lot. We pull out and around to the next entrance which had the gravel lot. A lot less cars down there. In that first lot, I wouldn’t say I felt unsafe, but indifferent maybe.
So anyway, we get out and you have to walk down the creek about 300′ to the practice basket and trail for Tee #1. They had a really nice large, flat area with a practice basket and large stones marking 10′, 20′, 30′ and 40′ distances to putt from. After a bit of flippin’, we head up the short trail to teepad #1. Hole #1 is pretty sweet to start off the round. Picture this. You’re teeing off from halfway up the hill in a cutout in the trees. You’re roughly 30′ up teeing off over the creek, through the clearing and up the hill on the other side to a basket nearly 360′ away. Nice!
This large creek (trickling stream) bed runs through the park and comes into play for the first four holes and 11 and 18. I love how open and large this park is. There are trees in the open parts, but it’s not dense and the mature trees are spread nicely down/across the fairways for obstacles. After the first 6, you start into the woods where the fairways get tighter as your technical games comes out.
The course consists of mostly longer holes with the shortest only being around 240′ and going to the signature Par 5 Hole #18 at a hella-long 850′! I had a great time and never once felt unsafe once we actually got onto the course past the parking lot areas. I would definitely go back and play again with a group. Either way, I wouldn’t play the course alone. Play in a group.
You can tell how hard the crew works to keep this course up as best as possible. The landscaping, lines, and pin placement is excellent. I know they constantly work every Saturday mornings on the course using all 100% volunteer labor. There’s still lots to be done and they do only have carpet tee pads and temporary signs for now. I’m listing it as a con for now, but I know this park will be Awesome when it’s finally done. =)
PROS:
-Great layout and terrain. Loved the elevation changes and long open fairways.
-Enjoyed the Fall weather/leaves changing color.
-DG Course not crowded at all.
-Excellent balance of open and wooded, tighter fairways. Really tests your skills requiring a variety of shot types.
-Nice park in general! I hope they can keep this park up and going!
CONS:
-Surrounding neighborhood/area
-One of the trashiest courses I’ve played as far as garbage, shopping carts, baby strollers, baby cribs, random clothes lying in the woods/creek beds along the course. The park itself is really nice, don’t get me wrong. Just needs cleaned up in the woods.
-Temp signage; one was missing. I wish they had the Par listed on them. I had to constantly check my internet to see what DGCourseReview.com had each hole listed as.
-Carpet teepads; I know they’re working on getting concrete teepads.
-Hole #14…where is the basket? We couldn’t find it. Threw down fairway through mando, then ended up throwing 90 degree to the right across the creek to basket? Later realized this was Hole #17 basket. Do they share a basket?
-There is a good bit of walking between some baskets to the next teepad. We spent some time trying to find where the next holes were. Better directional arrows would help.
FINAL THOUGHTS: I say, GO PLAY IT! (midday, with some friends)
-jt
Hello Everyone! Want To Build Your Own Quality Basket?
I’m proud to now be apart of Dogleg Disc Golf!
My name is Destin and I’m originally from the Ann Arbor area of Michigan, but currently reside in Marietta, GA for school. I’ve been playing DG for about 5 years, and love every facet of the sport.
Back in 2010 I designed and built my own basket. The cost was less than $100, and the feeling of using your own basket beats buying one any day; and it truly works just as well as a basket at the park.
Below is my original post I put on my own Michigan Blog a couple years ago. I hope everyone can use the information to make their own backyard basket!
It may not be worth it to spend a lot of time making your own basket when nowadays a portable basket is not much more more than the cost of this basket, but I certainly want everyone who views Dog Leg Disc Golf to have this option.
And always remember that all questions are welcome!
Enjoy the Greenleaf Basket! Named after the road it was designed and made on.
Destin
——
– Original post: 2010 –


Wanna go to Indigo?
I haven’t posted in a while due to the fact that other than league night on Wednesdays at George Ward, I haven’t played that many different courses lately. This post is long overdue for the course and this could be a blessing in disguise that I’ve waited such a long time to recollect my experiences in a nutshell. On my first two trips to this park I was accompanied by Tony Sanders – props to him for giving me valuable insight into a straighter drive with added distance.
The course = brutally awesome
The park = sketch
Highlights
- Coming together quickly for such a new course due to the efforts of volunteers associated with DGB – great job guys!
- Great layout with an intimidating first hole
- Very scenic hike – can even catch a glimpse of a rusted out car hull from the 50’s
- Tee pads are poured concrete
- For such a heavily wooded area, poison ivy is contained to the perimeter
- Gate at front entrance – doesn’t go anywhere but looks cool
- Amateur and pro pads – diggin’ this even though not playing pro pads
Sketch/This sucks/Why is this happening to me
- Got into chiggers – left and right legs from knee down covered
- Weird hiker on course
- Called a friend in the medical industry about the empty packets I found on the course and apparently it is similar to methadone – sketch
- Stung on right jaw bone by yellow jacket on hole #18
- No trash cans on course or parking lot area
- Slow drive bys in parking lot
- Found a shoe and backpack off gully on right side of #1 – don’t need a ‘Stand By Me’ moment
- Pulled tick off stomach and got a slight infection on the area it attached
- People sitting and/or sleeping in their cars at park entrance – because I normally like to pull my vehicle into a city park’s parking lot to catch a little shut-eye
- Traffic coming in and out of Lake Heather’s gated access for boats
Keep in mind that for beginners looking to have an enriching first time to play disc golf, this is not the place for such an experience. Out of the local courses, George Ward is still the best place to take people new to the sport due to: chill folks playing, easy walk, not difficult keeping up with your disc and most importantly, Tom is there. For those that haven’t met Tom, you are definitely missing out on affordable merchandise (discs, accessories, etc.) and solid advice.
Four of the Dogleg crew (including myself) returned from Denver this past Monday. Stay posted for some stories on this adventure.
Joe
